Which Shopify theme do you have?
Have you set up your Shopify store before the launch of Online Store 2.0? Haven’t you changed it yet? If not, you’ll be running its original default theme, that is, Debut. The debut theme of Shopify is fully featured and simple. On the other hand, if you have built the Shopify store recently, you may be currently working on Shopify’s latest default theme called Dawn. Now, you would be wondering about the difference between these themes. The major difference between Debut and Dawn themes is Dawn’s 2.0 functionality that enables one to add or edit sections on every page. Both of the themes are simple to use, yet effective.Where Can You Find New Shopify Themes?
Well, it’s quite an easy task to add theme to your Shopify store. But, choosing the best Shopify theme from a pool of themes can be challenging. If you like the look and feel of certain Shopify stores, you can easily find out what theme they’re using and you can incorporate the same for your store. It is crucial that you find an attractive yet functional theme that can help you drive conversions for your store. So, you can find themes for your store in the Shopify Theme Store and third-party sites or developers.Shopify Theme Store
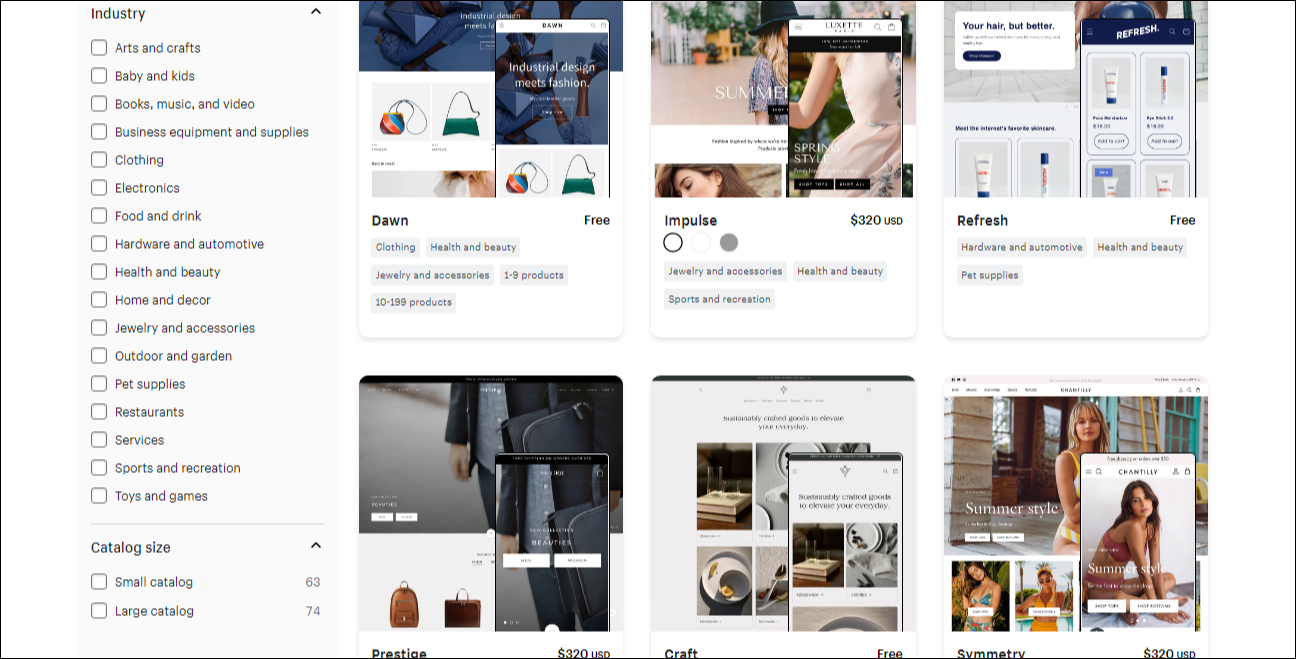
The Shopify Theme Store offers a wide collection of free and premium themes which guarantees rich features, functionality, and compatibility. To access the theme store from your Shopify dashboard, go to the Online Store > Themes > Visit Theme Store. There, you can find both free and premium themes and can even filter them by various categories, which include:- Price
- Industry
- Catalog Size
- Features
Third-Party Sites & Developers
If you aren’t able to find a theme that suits your brand perfectly, you can consider trying it out at other marketplaces. Third-party sites like ThemeForest also sell Shopify themes. You can easily customize any theme after uploading it to your store. Other than that, you can even work with a Shopify developer to help you create a custom Shopify theme for you. This could be both expensive and time-consuming but would be worthwhile in the end.How to Upload Your Shopify Theme?
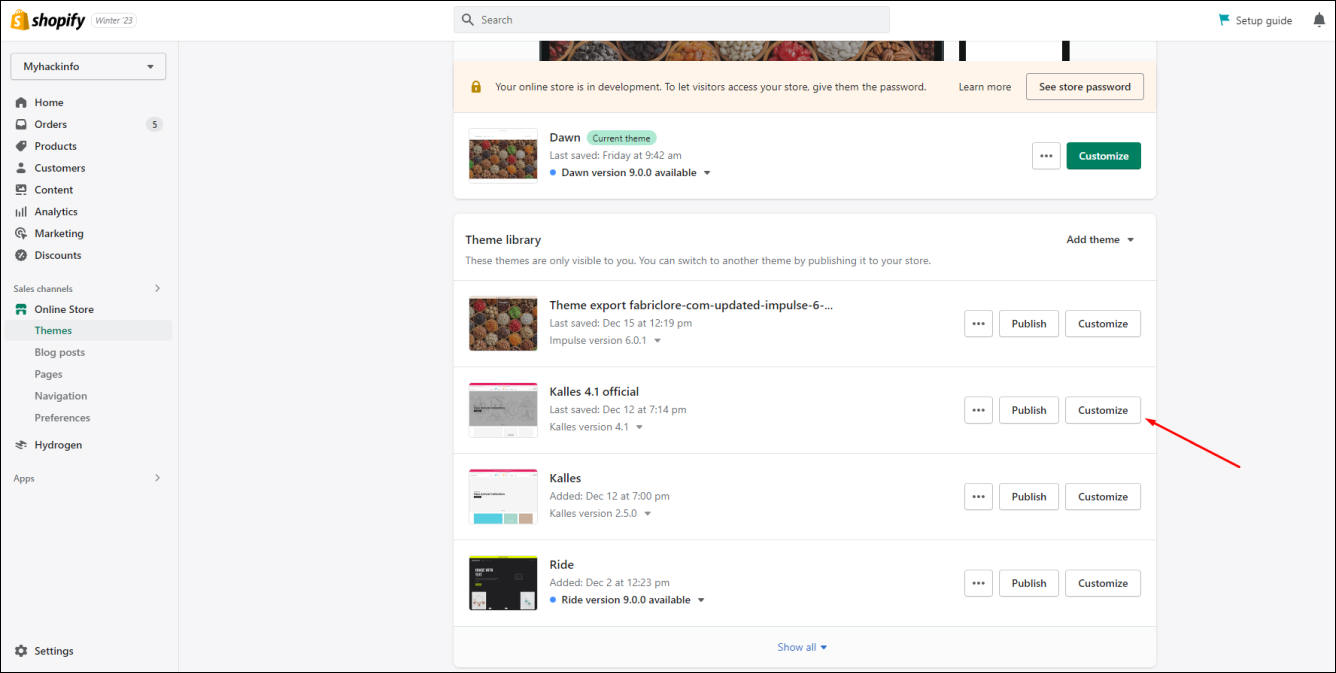
If you’ve got a theme from the Shopify Theme Store, it will be available in the dashboard. To make it your current theme, click on Online Store > Themes > Publish.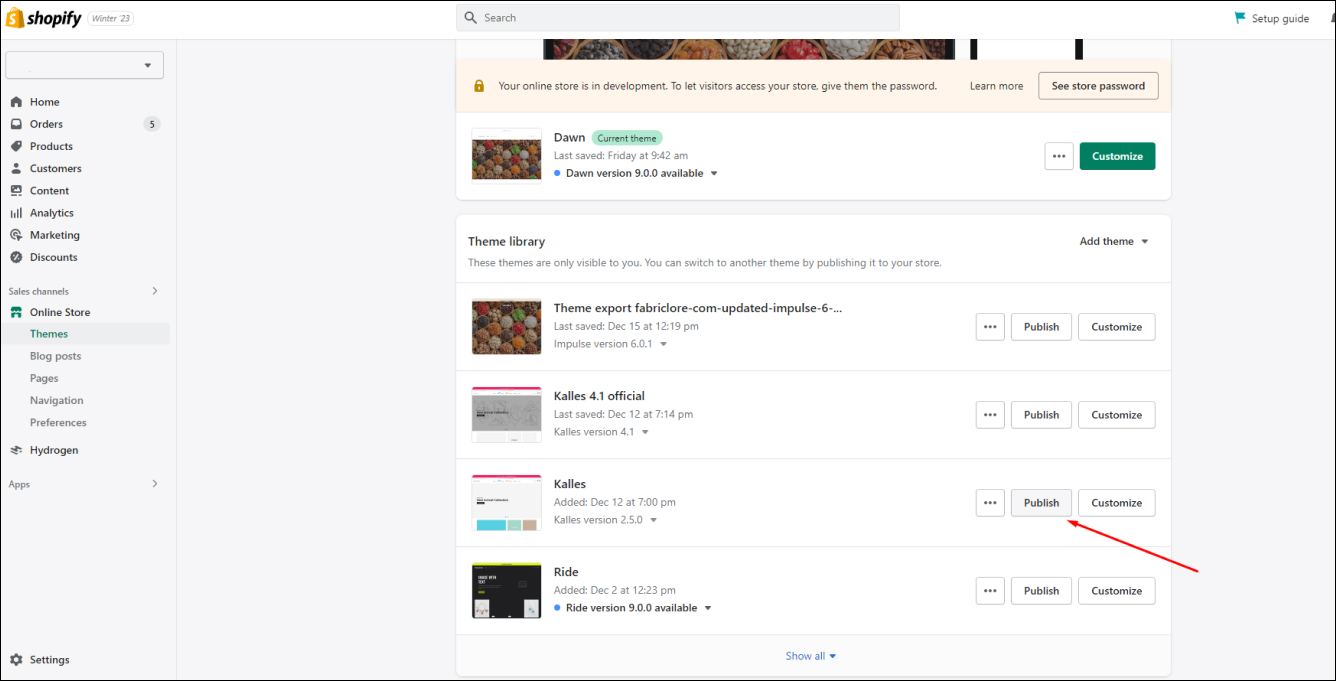 To customize it further, just click on Online Store > Themes > Customize and you’re all good to go!
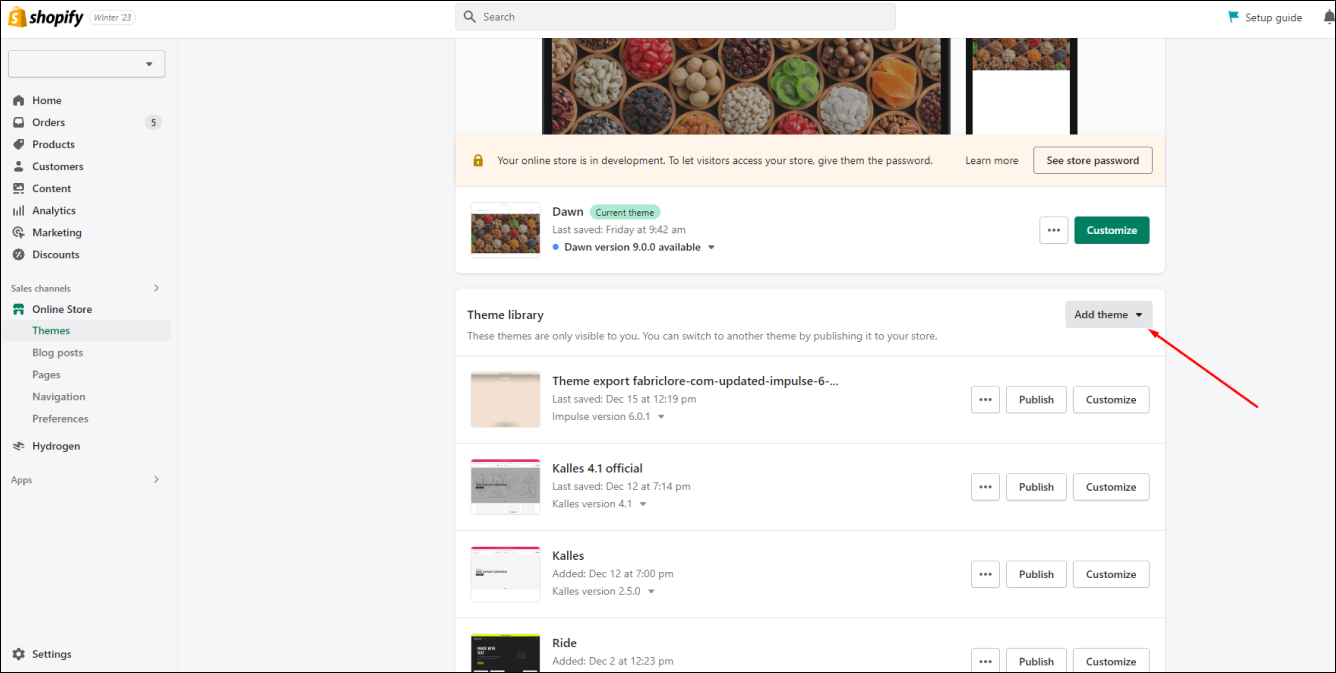
 If you’ve bought themes from any third-party sources or have it developed by Shopify experts, you’ll require to upload them before you customize them. To upload your Shopify theme, go to Online Store > Themes > Add Theme.
Steps to Increase Conversions by Shopify Theme Customization
Running a Shopify store without leads and conversions is just a waste of time, effort, and money. If you aren’t working towards improving your store’s conversions, then it’s a missed opportunity from your end. To help you out with that, here’s a list of steps that can help you increase conversions by customizing the Shopify themes.Step 1: Choose a Theme That Works Best For Your Store
The process of designing your Shopify store begins with choosing the right theme. This decision of theme selection depends upon your niche. There are many industry-specific themes for one to choose from. Shopify offers a few free themes, but other functional themes come with a premium of between $160 – $240. Selecting the right theme for your Shopify store plays a crucial role in the process. You can’t just choose one random theme that seems okay to you. There’s much more involved in it. Those are:- Research your competitor’s store design.
- Know your store design expectations.
- What should be the overall experience of your customers?
- The way you want your products to be displayed on the storefront.
- What additional designs do you want in your store?
Step 2: Tools for Shopify Theme Customization
For most of the Shopify themes, you can customize them using the default Shopify editor. You can edit this by going to the Online Store > Themes > Customize. This way, you can edit the theme the way you want. It allows you to make changes to your theme, which include: switching the images, rearranging the sections, modifying the text style and size, and more. It is much easier and quicker to use than you’ve ever thought.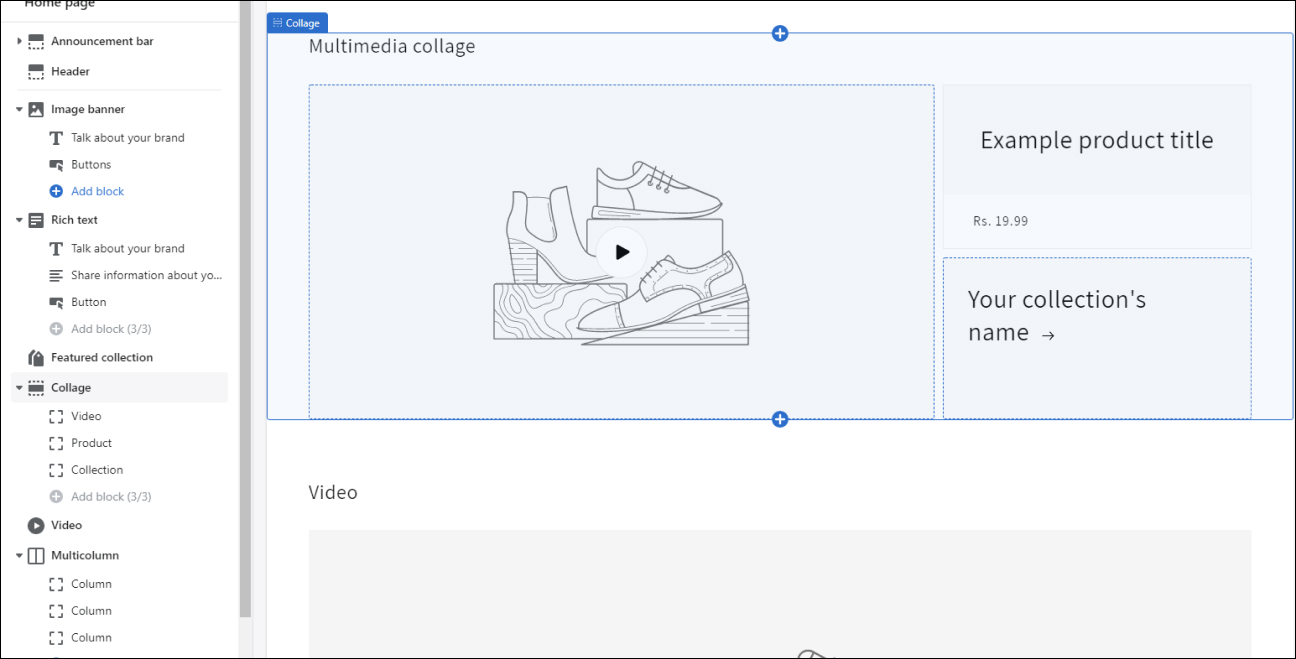
Step 3: Create a High-Converting Landing Page
No doubt the landing page would be the perfect place, to begin with! Generally, themes don’t come along with the landing page templates, and even if they come along with them, there are many variables to work in sync. Firstly, you need to set your goal, like what is it about generating sales, gathering emails, or increasing followers; creating a landing page will help you increase conversions. One of the suggested ways of creating a high-converting landing page is using a page builder. Follow all the necessary steps while creating a high-converting Shopify landing page:- Identify your value proposition
- Know who your target audiences are & their desires
- Provide powerful & concise content
- Eliminate the blockers
- Optimize for mobile devices
- Build trust in the customers through social proof & testimonials
- Get SEO optimized site

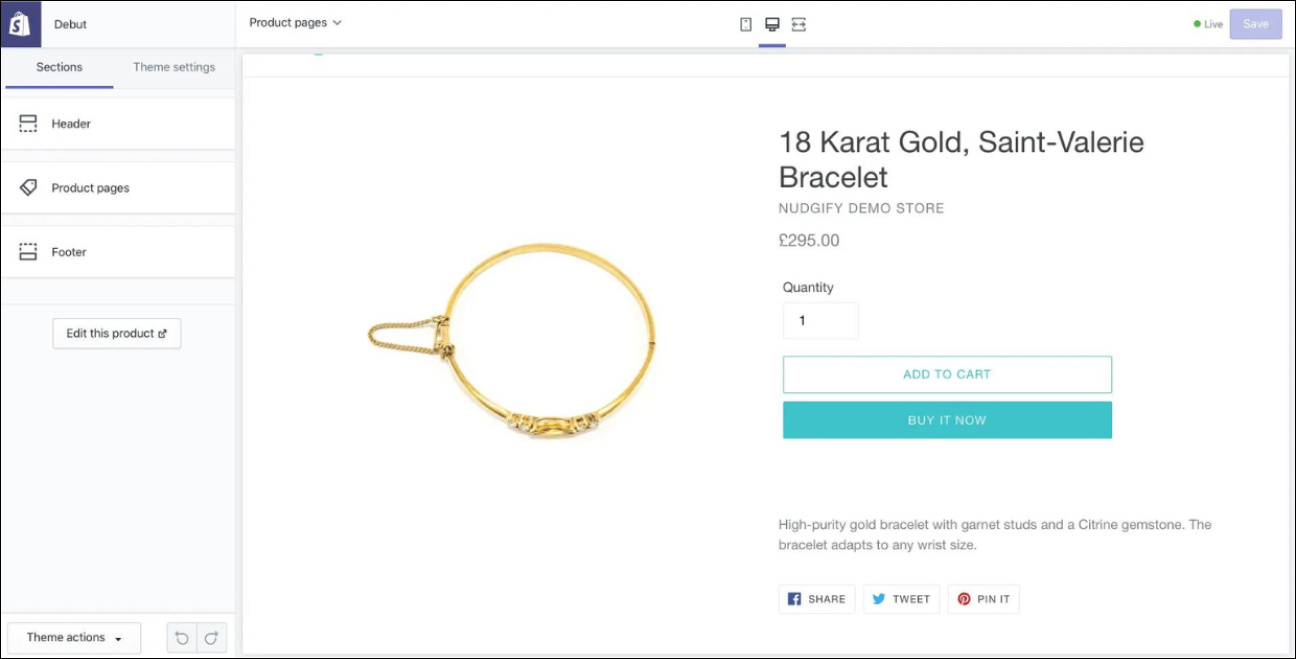
Step 4: Optimize the Product Pages
One of the shocking statistics reveals the fact only 0.9% of mobile visitors end up purchasing any product. While the remaining 99.1% of the shoppers leave the store and never return. You must know that if your store’s conversion rate is not three times more than 0.9%, you must know that your product page is failing. To help to avoid this issue from occurring, we have curated a list of factors that you must consider while optimizing the product pages:- It should be an outstanding product
- Must have quality product copywriting
- Add social proof
- Include high-quality visuals
Step 5: Edit the Checkout page & Avoid Cart Abandonment Rate
Do you already own a Shopify store? If yes, then from the Shopify admin page, go to Orders > Abandoned Checkouts. It will enable to you see the number of customers who reached the checkout page and left entirely. This usually happens when your checkout page isn’t optimized by your Shopify theme. Editing the checkout page will help you improve the customers’ experience and reduce the cart abandonment rate. It is one of the effective ways of making changes. To have hands-on it, you can go through our detailed blog for the tips to follow while you build or optimize a Shopify checkout page.
Step 6: Create Shopify’s Thank You Page
Even after your shoppers have made purchases in your store, your job isn’t completed yet. They decided to purchase from your store, and by the time they use your product, your brand will be on their mind. Now, if you offer more offers to them, it might seem attractive, and they might make more purchases from you in the future. To offer the best customer experience to your visitors, you can send them personalized product recommendations on the Thank you page to trigger their buying patterns, or you can even conduct a survey to collect their detailed information.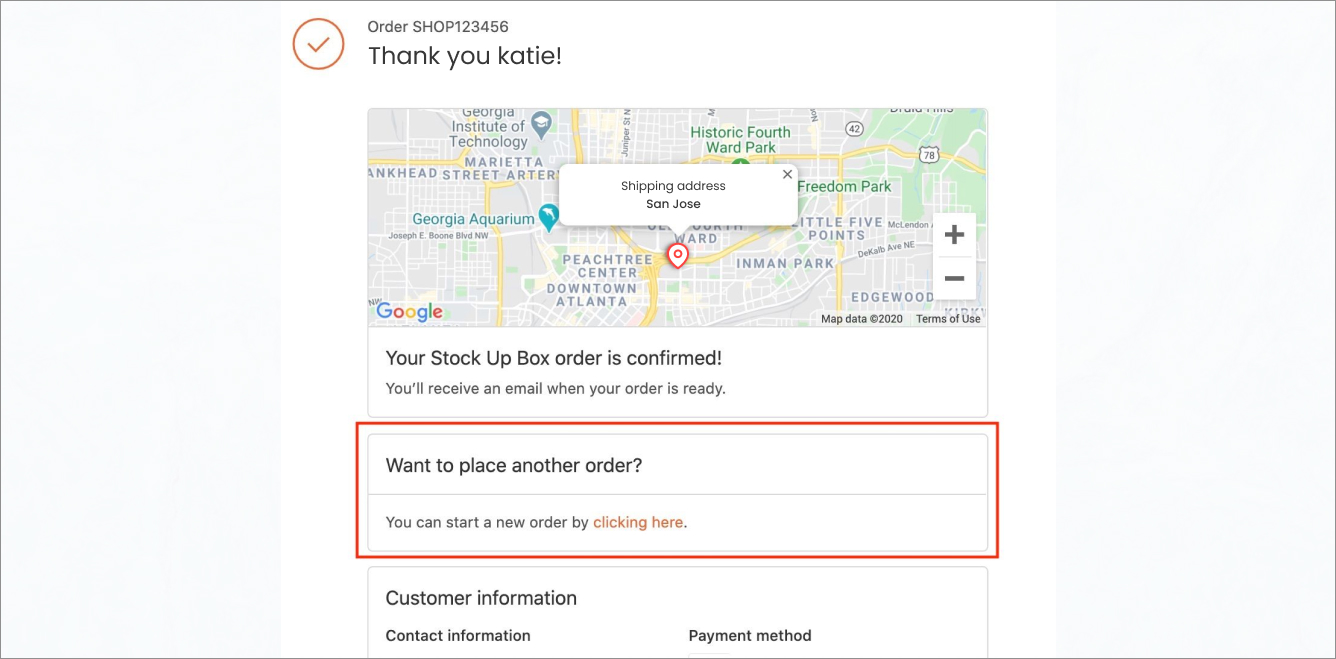
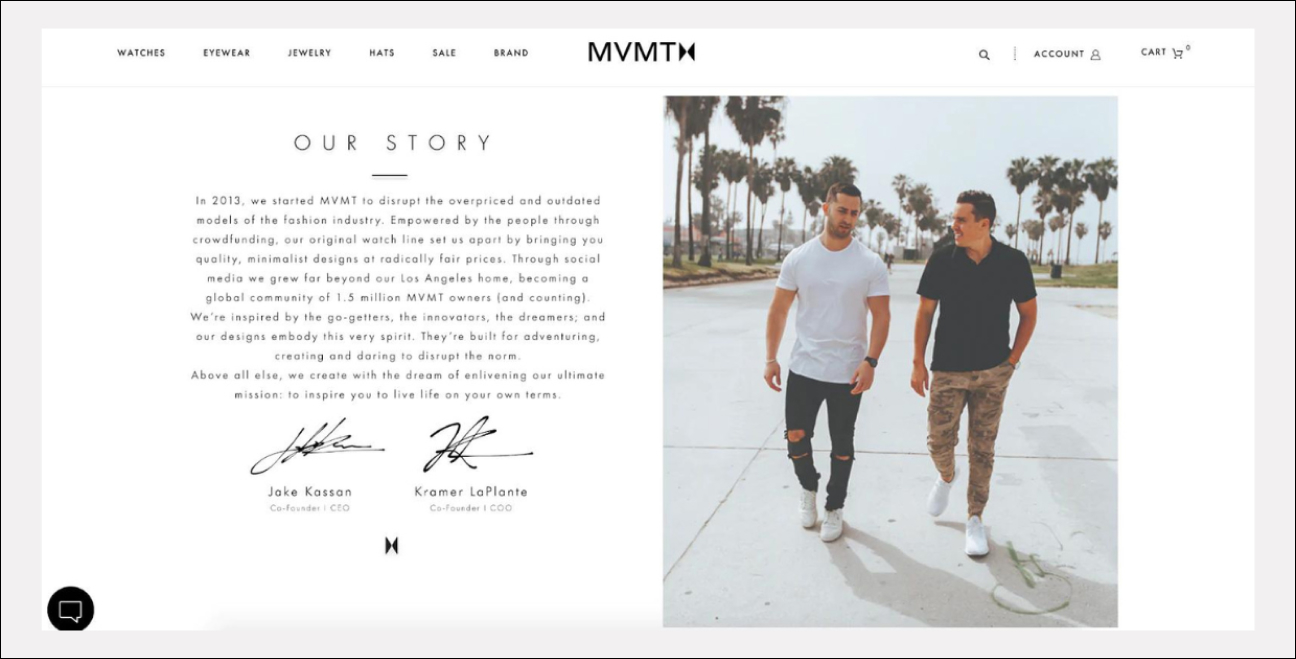
Step 7: Create a Fantastic About Us Page
Now, suppose while browsing through the web, you found an amazing store that offers an appealing range of products, but you haven’t heard of that brand before. Would you make a purchase then? Or, if you want to, how would you know that the brand is trustworthy? You’ll click on the about us page of that store. About Us page is a page where you tell your visitors, and customers get to know details about your brand, how you started, why they must trust you, and in the end, compel them to make purchases from your store. Here are some pro tips that will help you create a fantastic about us page:- Add a picture or video of your store or products
- Describe your business model
- Address problems and give solutions
- Display awards, testimonials, and reviews
- Add social media and CTA
Step 8: Create a “Coming soon” Page for Getting Early Traffic
Designing and developing a new product page for your newly launched product and getting visitors instantly takes time. If you wait till then, you could miss on opportunities to grow your brand and build an audience. Instead of that happening, you can build a “Coming Soon” page for your new and old customers to wait until the new product is launched. It will help you get visitors to your store when you launch the product. Sounds interesting? If yes, then start thinking about customizing your own Shopify coming soon page!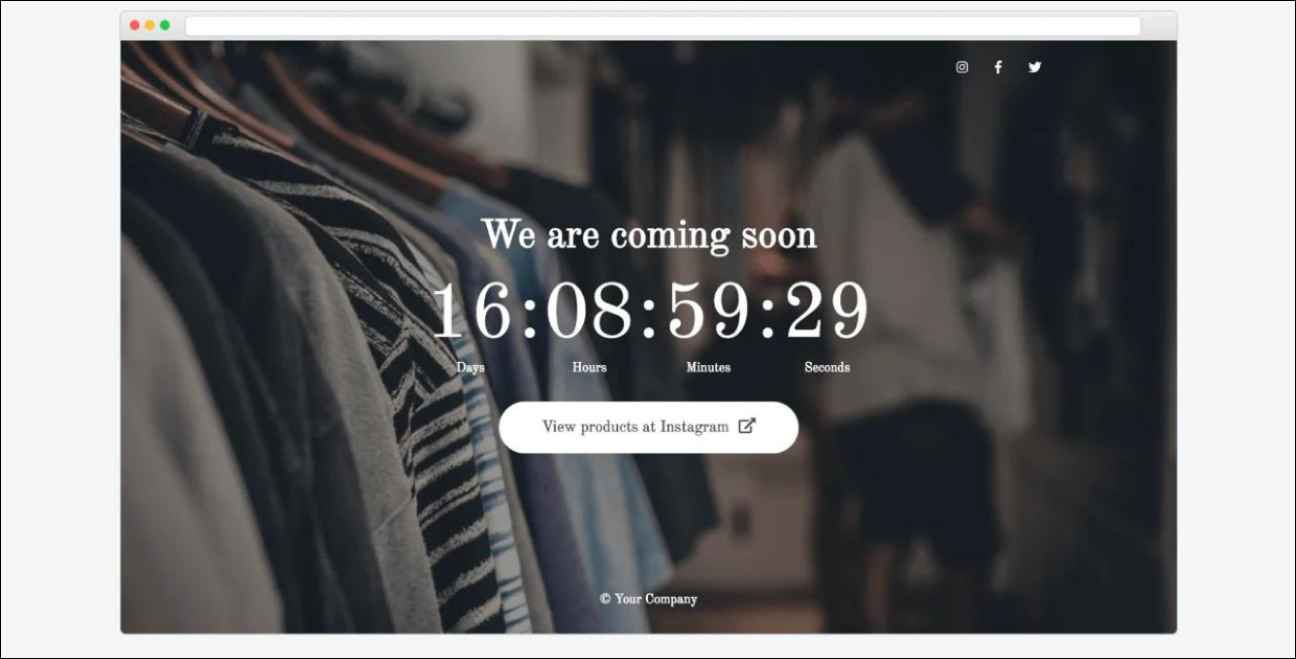
Step 9: Start Blogging on your Shopify Store
Relying too much on the advertisement can eventually lead to fewer visitors someday or the other. One of the solutions to help you, in that case, would be to create a blog page and start to gain organic traffic. One of the best parts about gaining organic traffic is that they’ll stay for a long period. Thus, create more content for your store. It will help you to get more organic search traffic on your store, and chances are some of them will turn out to be your customers. Moreover, creating your blogs can display your trustworthiness in the eyes of your customers. And you won’t miss that opportunity. Would you?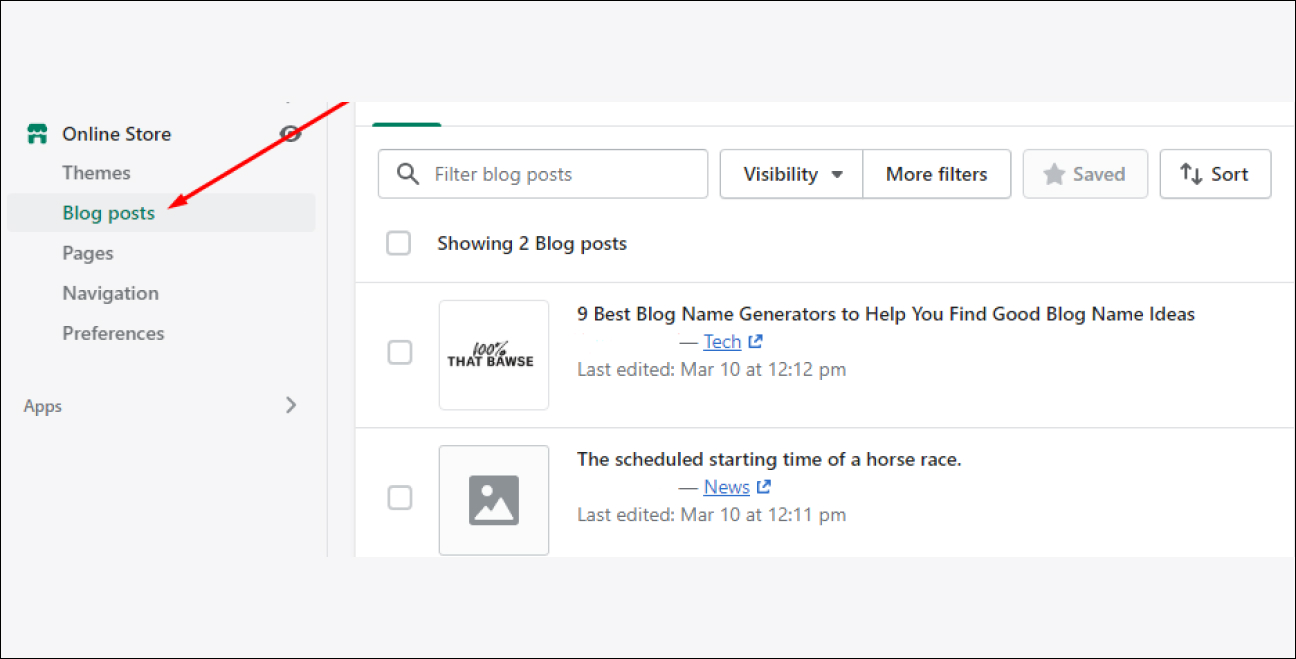
Let’s do it!
We’ve all been customers before sooner or later. So, take a step ahead, look through the customer’s shoes, and think whether or not you would make a purchase from a particular online store or not. Now that you have a list of steps and an entire guide, you can start your Shopify theme customization to achieve a high conversion rate for your online store. All you have to do now is to let your creativity flow and create a store that lets you gain more leads and conversions. And if you have any questions in mind, please do share them below in the comments section! Also, if you need custom Shopify theme customization, reach out to our Shopify developers today! What’s Next?Best Shopify Themes in 2023 to Boost Conversion Rates
Related: Looking for professional help? Explore our professional Shopify theme customisation services.