It isn’t the destination that matters – it is the journey! Have you heard this saying?
This may be true in some cases, but in the case of e-commerce site conversions (especially Shopify), the journey (quick and easy checkout experience) is just as important as the destination.
If your visitor changes their mind all of a sudden and leaves their cart behind, you’ll be losing not just a sale but a whole new customer.
If you are a new e-commerce store owner, you must know that the checkout page holds the risk of losing a lot of sales and customers. It has been estimated that the average shopping cart abandonment rate at the Shopify checkout page is around 65% to 97%, it depends on the niche industry.
Do you want to ensure that your visitors reach the final destination of becoming your customers? Here’s a guide on how you can accelerate the difficult Shopify experience for your customers and ensure that they complete their shopping journey.
What is checkout process optimization?
Checkout process optimization is a strategy that improves the store’s conversion rate. The reason behind optimizing the checkout page is to reduce the distractions present on the checkout page and reinforce trust through the checkout process.
How does checkout page optimization work?
The process of checkout page optimization ensures that all distractions are eliminated such that customers discover and buy the products they’re looking for. Therefore, customers must understand the steps involved in the checkout process.
The checkout page is like the grand finale of your store. It is the place where people finalize the products, shipping options are confirmed, and payment is chosen. Boosting the Shopify store’s conversion rate isn’t a daunting process.
If you are willing to give a boost to your Shopify store, you need to work on optimizing your checkout page.
Why Is It Important to Optimize Your Shopify Checkout Page?
Optimizing your Shopify checkout page is crucial for improving the overall user experience and increasing conversion rates.
Here are some of the reasons why it is important to optimize your Shopify checkout page:
- Reduces Cart Abandonment: A complicated checkout page is one of the reasons why customers abandon their carts in the end. Thus, optimizing it may help reduce the number of steps and make it more user-friendly, which can result in a decrease in cart abandonment rates.
- Improves User Experience: An optimized checkout page can improve the user experience of your customers by making it easy for them to complete their purchases quickly. This, on the other hand, can lead to higher customer satisfaction and loyalty, which results in repeat business.
- Increases Conversion Rates: Optimizing your checkout page can make it more streamlined and intuitive, which can further lead to high conversion rates. When customers buy everything from your store quickly, they are more likely to get converted into paying customers.
- Boosts Revenue: Optimizing your checkout page can also help you increase your revenue. By reducing cart abandonment and increasing conversion rates, you can generate more sales and revenue for your business.
Tips to Optimize your Shopify Checkout Page
When we talk about optimizing your Shopify checkout page, there are some things that you can do to improve the customer experience of your store and boost your conversion rate.
1. Add Your Business Logo
Have you noticed that Shopify displays your store name above the navigation on the checkout page? But, you can upload your customized logo and get it displayed on your store’s page. Displaying your logo instead of plain text can help build trust and make the checkout more integrated into your Shopify store.
Want to know how you can upload a custom logo to your Shopify checkout page? If yes, follow these steps:
- Visit your store’s admin area > Online Store > Themes, and click on Customize.
- A page will appear in front of you, and in the left-bottom corner, scroll, locate, click on Theme settings, and select CHECKOUT.
- Locate the Logo section and then click on Select Image.
- Upload your logo. You’ll be asked to confirm it. You can do so by clicking on Select.
- Review it properly and click on Save.
![]()
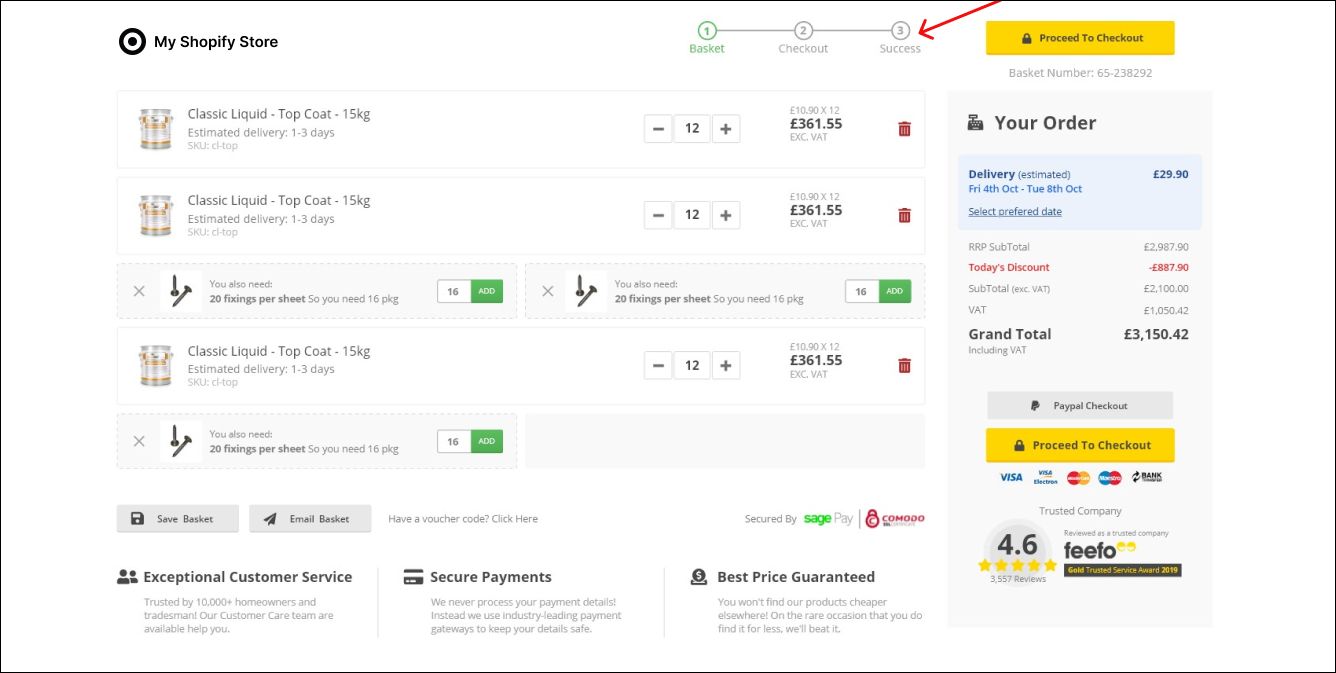
2. Reduce the Number of Fields
This is one of the most important tips. You must check out what all checkout fields (both optional & required) are needed by you. Less the number of fields, the more you’ll simplify your checkout process. This will directly help in increasing the conversion rate.
According to the latest study, complex checkout forms are one of the common reasons why people abandon the cart at the last moment. This is especially happening nowadays as customers aren’t willing to share their detailed information.
Here are the steps that can help you to remove some of the fields from your checkout page:
- Visit your store’s admin area > Settings > Checkout. Scroll down until you find ‘Form’.
- Now select only the fields that are important to you.
- Click on the Save button.

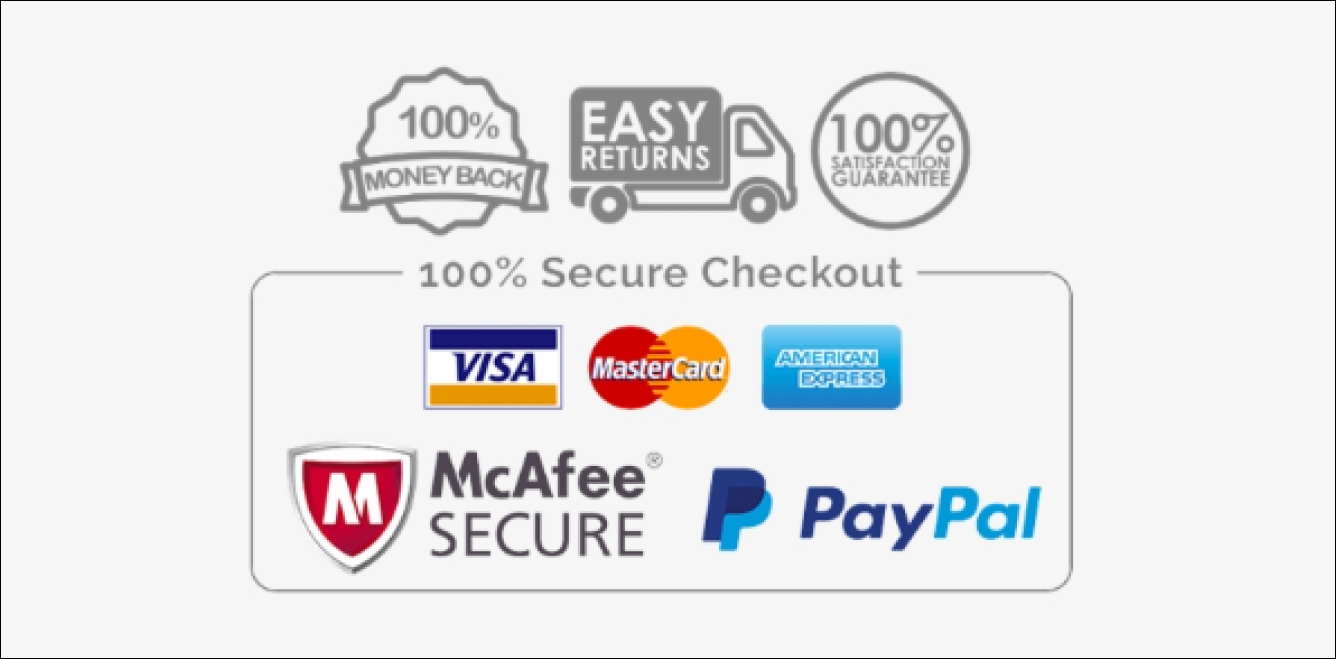
3. Add Trust Badges
One of the possible reasons why people abandon the cart at the last moment is a lack of trust. According to the latest research, almost 22% of people leave the cart at the checkout page just because they don’t trust the store with their private data.
You must pay attention that adding trust badges on the storefront and even on the checkout page can help in enhancing your customer’s checkout process.
Here are some of the additional tips that can help in increasing your customer’s trust during the checkout process:
- Ensure that you use your brand’s logo even on the checkout page.
- Customize the style of your checkout page to match it with the storefront.
- Focus more on gaining trust by simplifying the payment procedure on the checkout page.
- Add your store’s contact information.
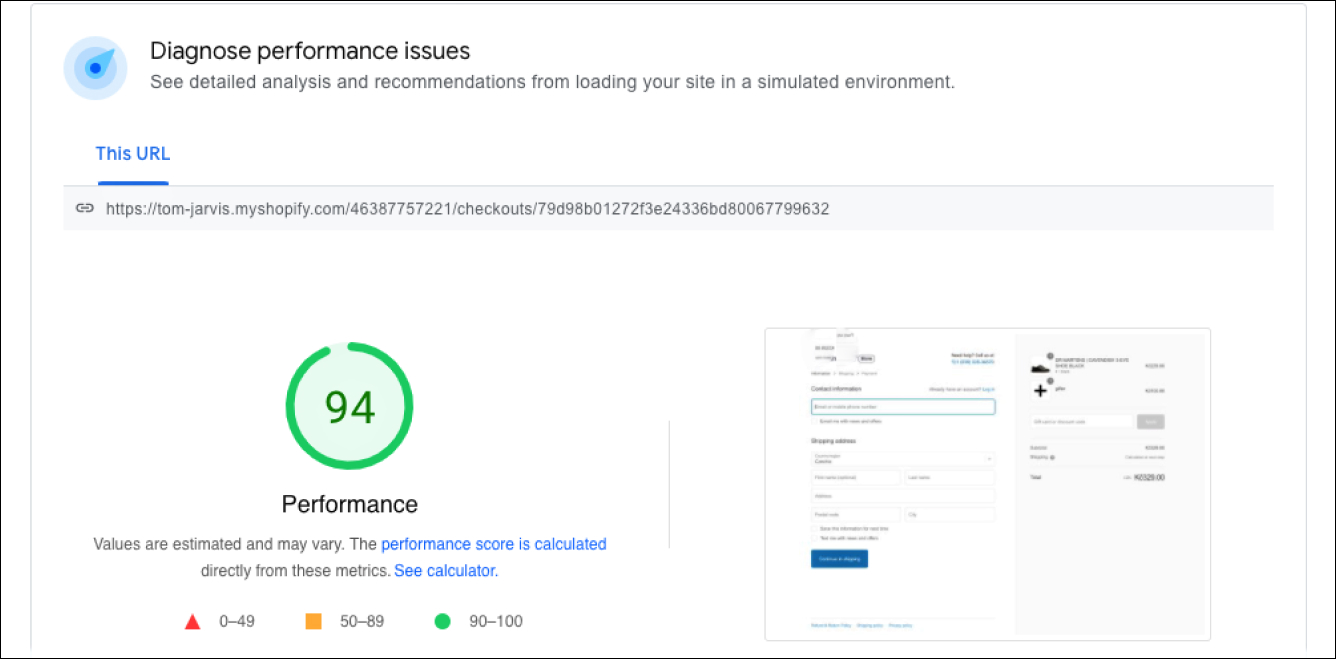
4. Optimize the Checkout Loading Speed
You would know that a site’s speed plays a crucial role from both SEO and conversion point of view. According to the latest statistics, the conversion rate drops by 5.42% with every increasing second of load time.
If you want to measure your Shopify store’s checkout page load time, you can use the built-in online store speed. This built-in tool measures the speed on the homepage, product, and collection pages. To check the speed of a particular checkout page, you can use PageSpeed Insights from Google and enter a specific checkout URL.
If you’re on the Shopify basic plan, you won’t be able to improve the speed. Still, keep the below-mentioned things in mind:
- Use compressed yet high-quality images for your logo at the checkout page.
- Ensure that you use fewer third-party apps or payment gateways as it can adversely affect the page’s speed during the checkout process
- Keep a regular check on the speed of the checkout page and ensure that it loads in a maximum of 4 seconds.
5. Enable Express Checkout Payments
Express payments give an option to the customers to skip the old and boring checkout process and use express payment methods like PayPal, GooglePay, Paytm, and more. This leads to high conversion rates.
To enable express checkout in your Shopify store, you need to follow the below-mentioned steps:
- Visit your Shopify store’s admin area > Settings > Payments.
- Now, you need to click on the Manage link for your card payment provider.
- Next, you need to add desired payment providers in the Wallets section, and lastly, click on Save.

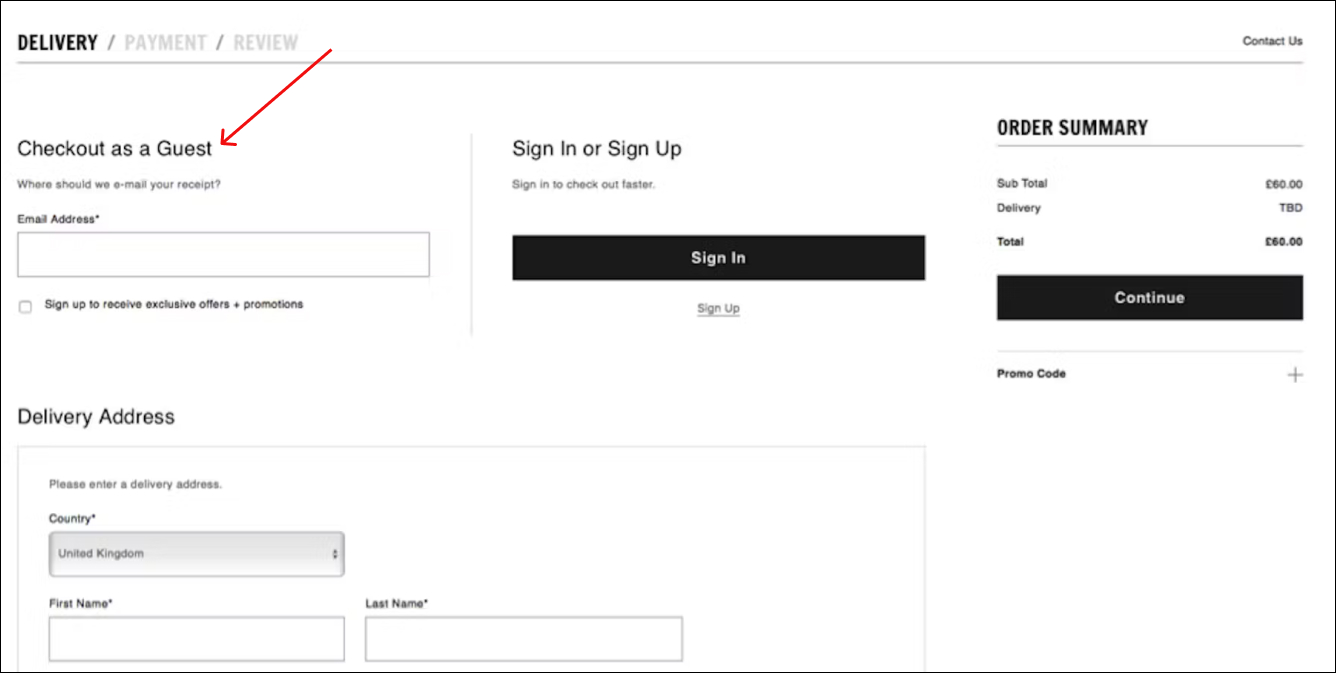
6. Allow Guest Checkout
Allowing guest checkout on your Shopify store can greatly enhance your checkout process by providing a quicker, more convenient option for customers to complete their purchases.
Customers can complete their purchases without creating an account when guest checkout is enabled. They can simply provide their email address and shipping information, and proceed directly to payment.
This may be especially appealing to new customers who may be hesitant to commit to making an account or to any consumer who wishes to check out swiftly without creating an account.
Enabling guest checkout can help to reduce cart abandonment rates. Sometimes, customers abandon their carts because they find the checkout process too lengthy or complicated, and requiring account creation can be a contributing factor.
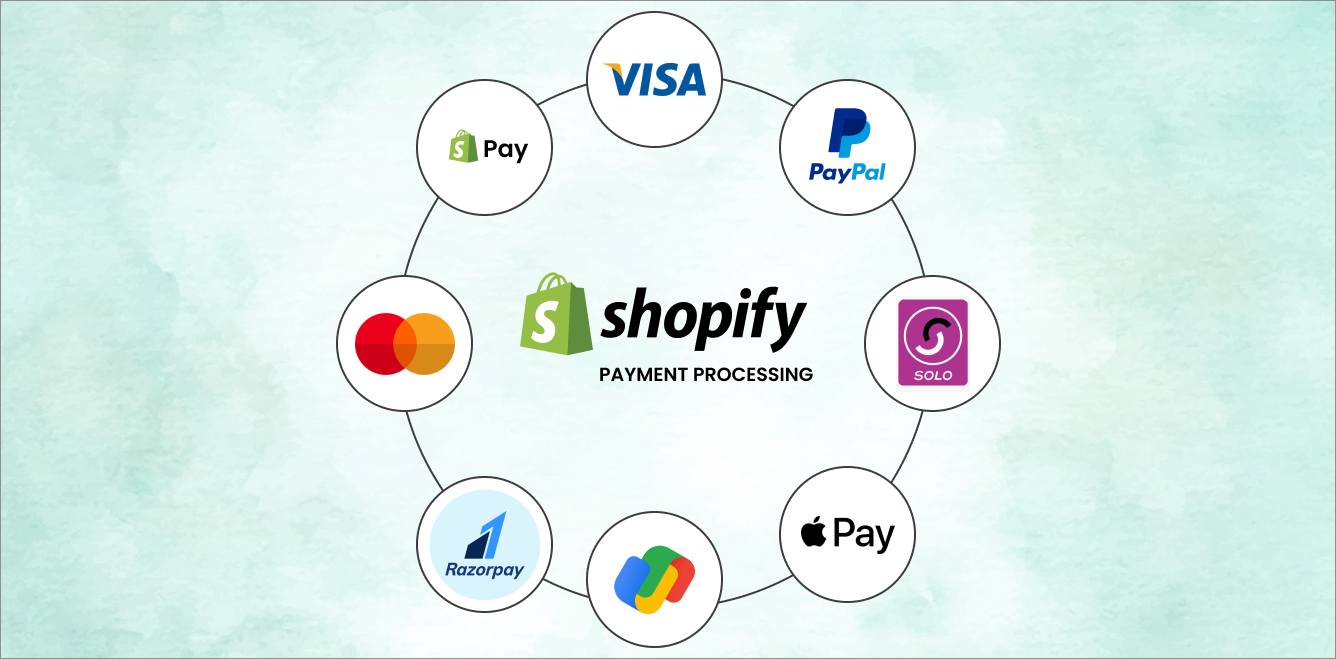
7. Provide Multiple Payment Gateways
Providing multiple payment gateways on your Shopify checkout page can significantly enhance your customer’s shopping experience and potentially increase your conversion rates.
By offering various payment methods, you cater to a broader range of customers, each with their preferred ways to pay. Some customers might prefer direct bank transfers, while others might favor digital wallets.
By accommodating these preferences, you reduce the chances of cart abandonment due to a lack of preferred payment options, thereby increasing the likelihood of successful purchases.
8. Consider Single-Page Checkout
A single-page checkout can significantly enhance the user experience on your Shopify store, thereby potentially increasing conversions.
Customers can make their purchases on a single, streamlined page instead of having to go through several pages or steps of navigation. Customers benefit from a speedier and more convenient checkout procedure because of this simplification.
By reducing the complexity of the checkout process, a single-page checkout can also help decrease cart abandonment rates.

9. Have a Mobile-Friendly Design
Having a mobile-friendly design for your Shopify checkout page is crucial in today’s era of smartphone dominance.
A mobile-friendly design makes sure that your clients have a smooth, seamless experience, regardless of the device they are using. As more and more people buy online using their mobile devices.
This design involves making sure that text is readable without zooming, links and buttons are adequately spaced for easy tapping, and navigation is user-friendly.
When your checkout process is optimized for mobile, customers can complete their purchases quickly and easily, reducing the likelihood of cart abandonment and boosting overall sales conversions.

10. Add a Progress Indicator
Your Shopify checkout page would benefit greatly from adding a progress bar, which might improve user experience and possibly boost conversion rates.
Online shoppers often like to know how long a task will take. A progress indicator provides this information, giving users an idea of the time commitment involved, which can help to decrease cart abandonment rates.
A series of dots, bars, or numerals may serve as the progress indication. The checkout process is broken down into several steps, including “Customer Information,” “Shipping Method,” “Payment Method,” and “Review Order.” The current step is indicated or ticked off on the progress indicator as the customer proceeds through the checkout process.
How to Edit Checkout Page in Shopify?
To match the look and feel of your checkout with business, you must edit the layout of the checkout page. So, here are the steps that can help you edit the checkout page in your Shopify store:
Step 1: From your Shopify store’s admin area, go to Settings > Checkout.

Step 2: Next, go to the Checkout Style section of the page and click on Customize Checkout.

Step 3: Select the Theme Settings from the left side of the page and scroll down the menu until you find Checkout. Click on it.

Step 4: To change the banner image for the checkout page, go to the Banner section. Click on Select Image to upload an image. Keep in mind that you keep the banner image size with a resolution of 1000 x 400 pixels.

Step 5: To change the logo for the checkout page, go to the Logo section. Click on Select Image to upload an image. Also, you can select the logo size and position for the page. Keep in mind that you keep the logo image size with a resolution of 450 x 250 pixels.
![]()
Step 6: To add a background image to the main content area of the checkout page, go to the Main content area > Background image section. Click on Select Image to upload an image. Keep in mind that you keep the background image size with a resolution of 1024 x 768 pixels.

Step 7: To add color to the main content area of the checkout page, go to the Main content area > Background color section. Click the color box to choose the most suitable color or you can even enter the hexadecimal code for the color you wish.

Step 8: To change the color of the form fields for the checkout page, go to the Main content area and scroll down to Form Fields. Click on the dropdown menu and choose either White or Transparent.

Step 9: To add a background image to the order summary area, go to the Order Summary section. Click on Select Image to upload an image.

Step 10: To add color to the order summary area, go to the Order Summary section. Click the color box to choose the most suitable color or you can even enter the hexadecimal code for the color you wish.

Step 11: To change the font for the checkout page, go to the Typography section. Here, you can choose your favorite font by clicking on the drop-down option for the Headings and Body.

Step 12: To change the button, accent, or error colors for the checkout page, go to the Colors section. Now, open the color picker by clicking the color box beside Accents, Buttons, and Errors. Or, you can even enter a hexadecimal code for the same.

What are some basic checkout page principles?
- Clarity: Give your customers clear instructions such that they know what to expect and what they can get. Also, keep payment short and simple.
- Simplicity: Keep information on the checkout page simple such that your customers don’t have to think twice before hitting on the Buy button.
- No Distractions: Eliminate everything that you think can make people bounce off to other sites or abandon the cart.
- No Anxiety: You should avoid anything that creates confusion in customers’ minds.
Conclusion
Now that you’re well aware of what lies behind a successful Shopify checkout page, you need to work on understanding your customer’s needs and requirements and apply changes accordingly.
An optimized Shopify checkout page leads to more visitors and, thus, more conversions. And this is why you must work on developing a smooth checkout experience for your customers.
You must work on developing a few tactics and techniques to improve your existing Shopify checkout process. Here, we’ve listed some tips that can help you understand how you can enhance your customer’s checkout page experience.
If you have more tips in your mind, don’t forget to share them with us in the comment section. And if you need additional help, reach out to us.
Explore more blog posts: