New to metafields? Start with our complete guide to Shopify metafields.
Quick answer: Shopify product metafields let you add custom data to individual products — size charts, materials, downloadable specs, and more — and display it on your storefront without changing Shopify’s built-in product fields.
Do you think that you need to hire Shopify developers for adding custom fields for your products? Or do you need Shopify apps for creating product metafields? But now, you don’t need any of these! Wondered how? After the new release of Shopify’s metafields, one can easily add various custom metafields for your variety of products. Creating Shopify Metafields is an easy task, it just requires some steps to be followed such that you achieve desired results. This blog will help you create product metafields and showcase them on your Shopify store. But, first, know what Shopify Product Metafields are, and then begin with the steps!What is Shopify Product Metafields?
With product metafields, a Shopify merchant can help add extra information about the products on their online store. It enhances the workflow of the online store. By including product metafields in the section, online merchants can add details about the product such as color swatches, weight, a summary of the product, and more. As a result, you can create high-converting product pages and build personalized user experiences for your shoppers.Steps to Add Product Metafields in Shopify
Shopify allows you to create various types of product metafields based on the type of content you want to show on your store, including text, image, number, date & time JSON, URL, and many more. Isn’t this seem to be interesting for you? Let’s get into the steps that can help you create product metafields in your Shopify store: Step 1: Log in to your Shopify admin area and click on Settings > Custom data, then open Metafield definitions.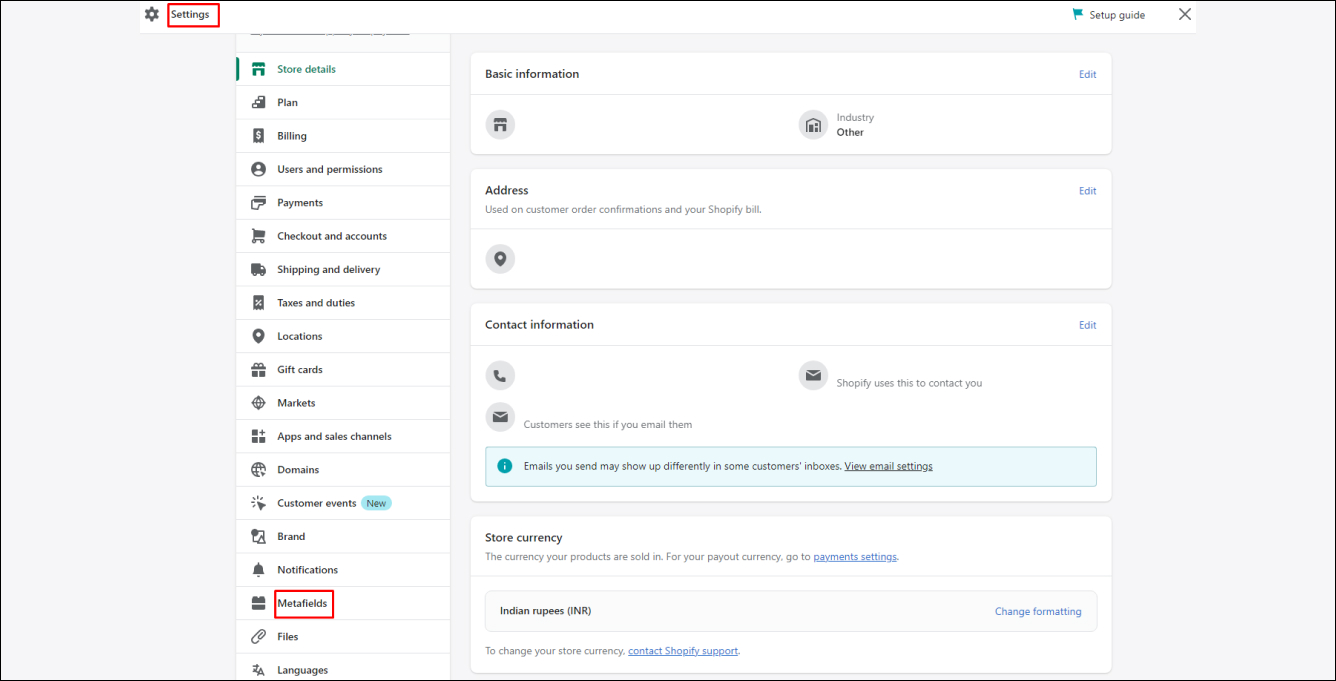 Step 2: In the metafields type, click on the Products.
 Step 3: Next, click on the Add definition that you may find on the upper right side of the page.
 Step 4: Here, you need to give a name to your product metafield.
Step 5: Let the Namespace and key be as it is.
Step 6: While it isn’t mandatory, you can add a description to your product metafield. Here, you can describe the purpose of creating it.
Step 7: Check and mark the Give access to Storefront API requests option.
Step 4: Here, you need to give a name to your product metafield.
Step 5: Let the Namespace and key be as it is.
Step 6: While it isn’t mandatory, you can add a description to your product metafield. Here, you can describe the purpose of creating it.
Step 7: Check and mark the Give access to Storefront API requests option.
 Step 8: Next, choose a content type from the drop-down list. It shows the type of value you want the metafield to store.
 Step 9: Now, you’ll be shown different Validation options for the metafield values based on the content type you choose. Double-check the validation rules before you select.
 Step 10: Lastly, don’t forget to click on the Save button.
 If you’re creating product metafields using the Standard definition, you don’t need to write down the name, namespace, key, description, content type, or anything. All you need to do is to select one from the list and hit the save button.
That’s it with how to create product metafield in Shopify. The next step involves adding values to the metafields you created.
If you’re creating product metafields using the Standard definition, you don’t need to write down the name, namespace, key, description, content type, or anything. All you need to do is to select one from the list and hit the save button.
That’s it with how to create product metafield in Shopify. The next step involves adding values to the metafields you created.
How to add value to Product Metafields in Shopify?
When you’ve successfully created the metafields definition, you may see that the metafields have been added to the areas of the admin area. For example, we’ve added a metafield definition named “Care Guide” as you can see in the above reference. And, it will be added to all the products in the Shopify admin automatically. Go through the below image to get a better understanding.
 To see all the metafields for a particular product, you need to click on “Show All”.
Steps to add value to the metafields in the Shopify are:
Step 1: To add value to the metafields, click on the empty space beside the name of the metafield. Step 2: Based on the type of value you chose, you will be shown the options to be entered in the value such as the text box, image browse button, date & time selector, and more. You need to enter a value there. Lastly, click on the Save button.

How to Display Product Metafields in Shopify?
Once you add values to the product metafields in Shopify, you can display those data on your Shopify store and provide an amazing user experience to your visitors and shoppers on the store. To showcase metafields on your Shopify store, you need to connect the existing metafields that you created to your current store theme.Steps to connect the metafields to your Shopify store theme are:
Step 1: From the Shopify admin area, click on the Online Store and then Themes. Step 2: Next, click on the Customize button. This will take you to the theme editor of your current store theme.
 Step 3: Open the page template where you wish to display the value of metafields. Here, we’ll open the Product page.
 Step 4: Next, add a block to the product page where you want to display the metafield values.
 Step 5: In the right-hand corner of the page, you’ll see the Connect dynamic source icon. Click on it.
 Step 7: Add some text or integer to display the metafield value in a better manner. And click on the Save button at the end.
 Congratulations! We did it!
This way, you can add more metafields to your store’s theme and make your Shopify store stand apart from the competitors.
Congratulations! We did it!
This way, you can add more metafields to your store’s theme and make your Shopify store stand apart from the competitors.