One of the best features of Shopify is that it permits an individual to add new features and functionalities to any page without having to redesign the whole theme.
You can add extra functionality on a page by integrating a plugin, but if you want to add the functionality that comprises just several lines of code, then you can do so by entering JS rather than investing your time and efforts to generate a plugin.
The best part about adding JS is that it can act as a plugin and still can be used to add many features and functionalities to any page.
Why You Must Optimize Shopify Checkout Page?
Think about the time and efforts you’ve invested in your Shopify store to make it look perfect and generate maximum ROI. You visit all the pages only to ensure that nothing discourages a visitor making a purchase.
After your Shopify store goes live, you start to generate good traffic to your store, and everything seems fine, but suddenly you notice that your conversion rate is too low. Lots of people reach the checkout page, but that’s as far as they go.
You wonder why people aren’t people reaching beyond the checkout page so that you get more sales! We understand what’s it like, and thus, we want to help you.
Chances are that your online store might be missing out on some functionalities or features that are driving people away from your checkout page. You can add in extra functionalities, or you can even track why you’re losing out on a lot of customers by adding JS to the Shopify checkout page.
How to add JS to the Shopify Checkout Page?
The checkout page marks the most vital part of a customer’s journey. It requires customers to enter their information before the sale gets confirmed. Whatever may be your motive to add JavaScript, the question that arises here is how you will add the JavaScript code to your Shopify checkout page.
Here are all the steps required to add JavaScript to the Shopify checkout page.
Step 1: Go to your Shopify admin site
Firstly, make sure that you go to your Shopify store’s admin site

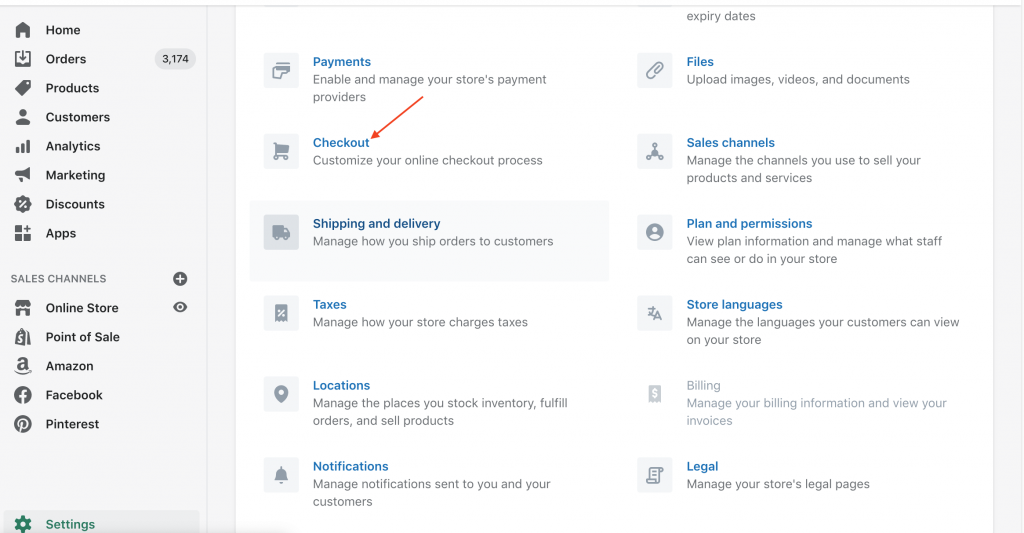
Step 2: Click on “Settings”
Here you have to go to the lower left side corner, there you will see an option that is named as “Settings”. Just click on it.

Step 3: Search for Checkout
After clicking on Settings, the adjoining page will be seen. Next, search for Checkout. Click on it.
Step 4: Add JavaScript code to Additional scripts
You’ll see a wide and blank box. Here, you can add your JavaScript code.

Step 5: Save & refresh your site to see the results
Save the changes made and refresh it to see the results on the page.
Believe it or not, this is as simple as it looks.
Is it looking better now? It converts many visitors into customers too!
There are many customizations you can do at your checkout page by just adding JavaScript code.
If you still have any queries about the Shopify checkout page optimization, reach out to us in the comments or by email. If you wish to set up your Shopify store or have your checkout page optimized, just let our Shopify developers know, and we’ll provide you with the best experience.