The e-commerce website builder, that is Shopify, offers the same set of features and functionalities to all Shopify merchants. Thus, you require specific or unique functionalities to make your store stand apart from the competitors.
Both customization and personalization matter if your end goal is to attract more customers to your online store. In this blog, we’ll learn how you can use Shopify variant metafields to add information about the product variants. This way, you can customize the product page.
Currently, the Online Store 2.0 theme allows you to add limited information for the products like price, quantity, media, and more. But with Shopify variant metafields, you can extend the limitation of adding product information to your store.
Here’s a guide that can help you create, add values, and display the Shopify variant metafields in your store.
What is Variant Metafields in Shopify?
Shopify variant metafields can be used to add custom fields to your product pages if you want to display any particular information about the product variants.
With it, you can display color swatches, fabric options, flavors available, and other product variant details in the metafields. You can use these metafields on the product pages to show product variations.
If you’re currently using the Online Store 2.0 theme, you can use the theme editor to add variant information to your product page.
How to Create Variant Metafield Definition?
Currently, Shopify offers two different types of variant metafield definitions:
- Standard Metafield Definition
- Custom Metafield Definition
In this blog, we’ll learn to create a custom metafield definition.
Let’s peek into the steps to create a variant metafield definition.
Steps to Create Variant Metafield Definition:
Step 1: After logging in to your Shopify admin area, go to Settings > Custom data, then open Metafield definitions.

Step 2: In the list of Metafields Types, go ahead by clicking on Variant.

Step 3: Next, click on the Add definition button.

Step 4: Enter a name for the metafield definition.
Step 5: Let the Namespace and key be as it is.
Step 6: You can add a description for your metafield definition, but it isn’t mandatory.
Step 7: Tick mark the Give access to Storefront API requests such that the metafield values are showcased on the storefront.

Step 8: From the list of content types, click on “color”. It shows the type of value the variant metafield will store. Lastly, click the Save button.

With this, you’ve successfully created variant metafields definitions. The next step is to add values to your variant metafields.
How to Add Values to Variant Metafields in Shopify?
Once you’ve created the Shopify variant metafields, you can add values to it. Let’s see how you can add values to the variant metafields.
Steps to Add Values to Variant Metafields:
Step 1: Once you’re at the Shopify store admin, go to the Products and click on any of the products you wish to add variants to.

Step 2: Scroll down to the page until you find the “Variants” section.
Step 3: Next, you need to click on the “Add variant” link.
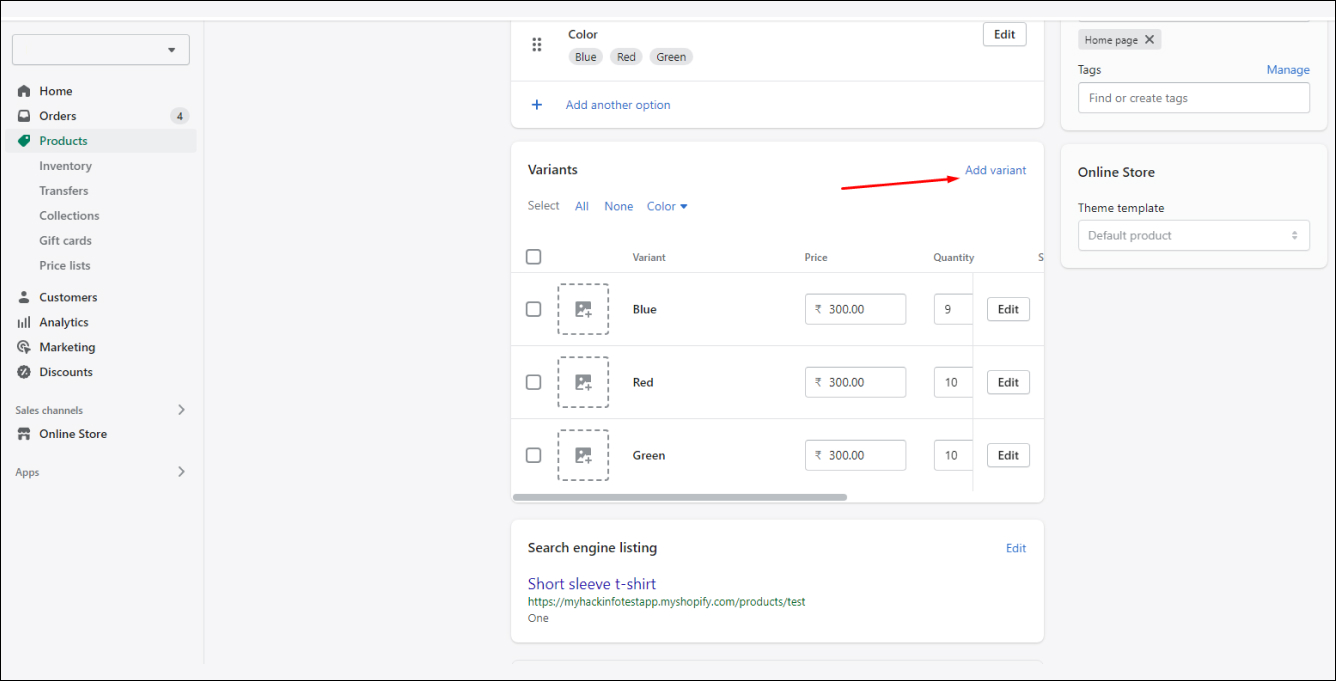
Step 4: Next, click on any product variant such that you add the metafield value.

Step 5: Again, scroll down the page to find the metafield section.
Step 6: Lastly, enter the value in the metafield for the product variant you’ve selected and click on the “Save” button.

In the same way, you can easily add metafield values for other product variants as well.
How to Display Variant Metafields on the Shopify Store?
Once you’ve added values to the variant metafields, it is now the time that you display them on the product pages.
Steps to Display Variant Metafield Values in Shopify
Step 1: Click on Online Store > Themes > Edit Code. This will direct you to the theme editor of Shopify.

Step 2: Next, you need to search for main-product.liquid in the left sidebar.

Step 3: Search for the “variant picker” in the code.

Step 4: Next, you need to copy the below-mentioned code and paste it under the variant picker
{% if option.name == 'Color' %}
{% else %}
{% endif %}

Step 5: Lastly, click on “Save” button.
This is how the color options will look in the frontend.

Conclusion
That’s it! These were the required steps that you needed to follow to display the variant metafields on your product page.
We hope that this blog helped you understand one of the types of Shopify metafields, that is, Variant Metafields. Also, you’ve learned how you can create and display the variant metafields in your store.
Are you excited to see the results? Just preview your online store now and tell us in the comments section whether you got the expected result!
If you’re caught in the middle way of a step or are confused regarding anything, reach out to us, and we’ll be happy to guide you!