
Undoubtedly, selling your products or services online is not at all an easy task. The e-commerce market is super competitive, and it is growing way too fast. Fortunately, your store can reach great heights with it!
Now, shoppers skip from brick-and-mortar stores to online stores, competition is only getting tougher day by day. And, the results for staying ahead of the competition will get better and bigger.
In a 2021 study, the estimated number of global digital buyers went up to 2.5 billion, and it keeps climbing every year.
Online shopping is growing immensely, and to get success, you need to be creative and aware of what your competitors are doing. You ought to know the choice of shoppers such that you create a positive impact on the customers.
With, Shopify theme customization, your online store can stand out from the crowd, and it isn’t that hard to do!
Building a Shopify store isn’t just enough. One needs to work towards it to get a high conversion rate. Optimizing the Shopify theme would make it work for you to get one step closer to high leads and conversions in your store.
Keeping that in mind, we’ve curated a guide with the necessary steps for Shopify theme customization. By the time you reach the end of this guide, you’ll have a Shopify store with a high conversion rate.
Which Shopify theme do you have?
Have you set up your Shopify store before the launch of Online Store 2.0? Haven’t you changed it yet? If not, you’ll be running its original default theme, that is, Debut. The debut theme of Shopify is fully featured and simple. On the other hand, if you have built the Shopify store recently, you may be currently working on Shopify’s latest default theme called Dawn. Now, you would be wondering about the difference between these themes. The major difference between Debut and Dawn themes is Dawn’s 2.0 functionality that enables one to add or edit sections on every page. Both of the themes are simple to use, yet effective.Where Can You Find New Shopify Themes?
Well, it’s quite an easy task to add theme to your Shopify store. But, choosing the best Shopify theme from a pool of themes can be challenging. If you like the look and feel of certain Shopify stores, you can easily find out what theme they’re using and you can incorporate the same for your store. It is crucial that you find an attractive yet functional theme that can help you drive conversions for your store. So, you can find themes for your store in the Shopify Theme Store and third-party sites or developers.Shopify Theme Store
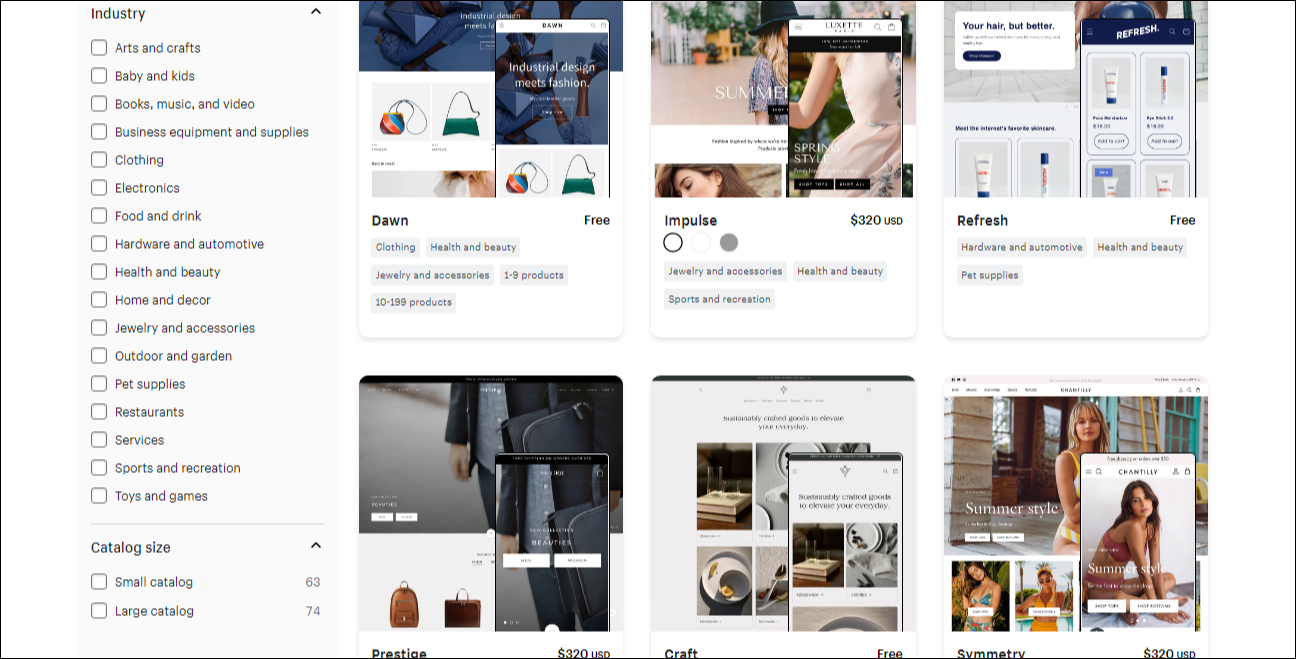
The Shopify Theme Store offers a wide collection of free and premium themes which guarantees rich features, functionality, and compatibility. To access the theme store from your Shopify dashboard, go to the Online Store > Themes > Visit Theme Store. There, you can find both free and premium themes and can even filter them by various categories, which include:- Price
- Industry
- Catalog Size
- Features
Third-Party Sites & Developers
If you aren’t able to find a theme that suits your brand perfectly, you can consider trying it out at other marketplaces. Third-party sites like ThemeForest also sell Shopify themes. You can easily customize any theme after uploading it to your store. Other than that, you can even work with a Shopify developer to help you create a custom Shopify theme for you. This could be both expensive and time-consuming but would be worthwhile in the end.How to Upload Your Shopify Theme?
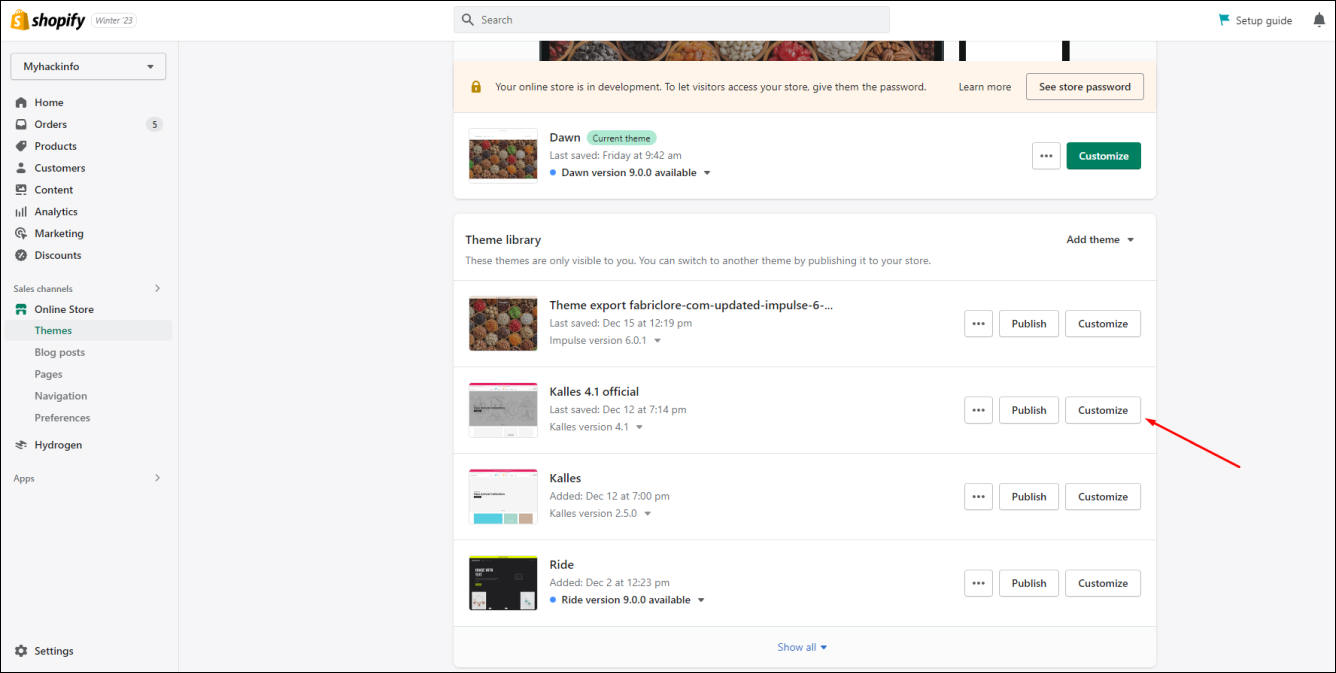
If you’ve got a theme from the Shopify Theme Store, it will be available in the dashboard. To make it your current theme, click on Online Store > Themes > Publish.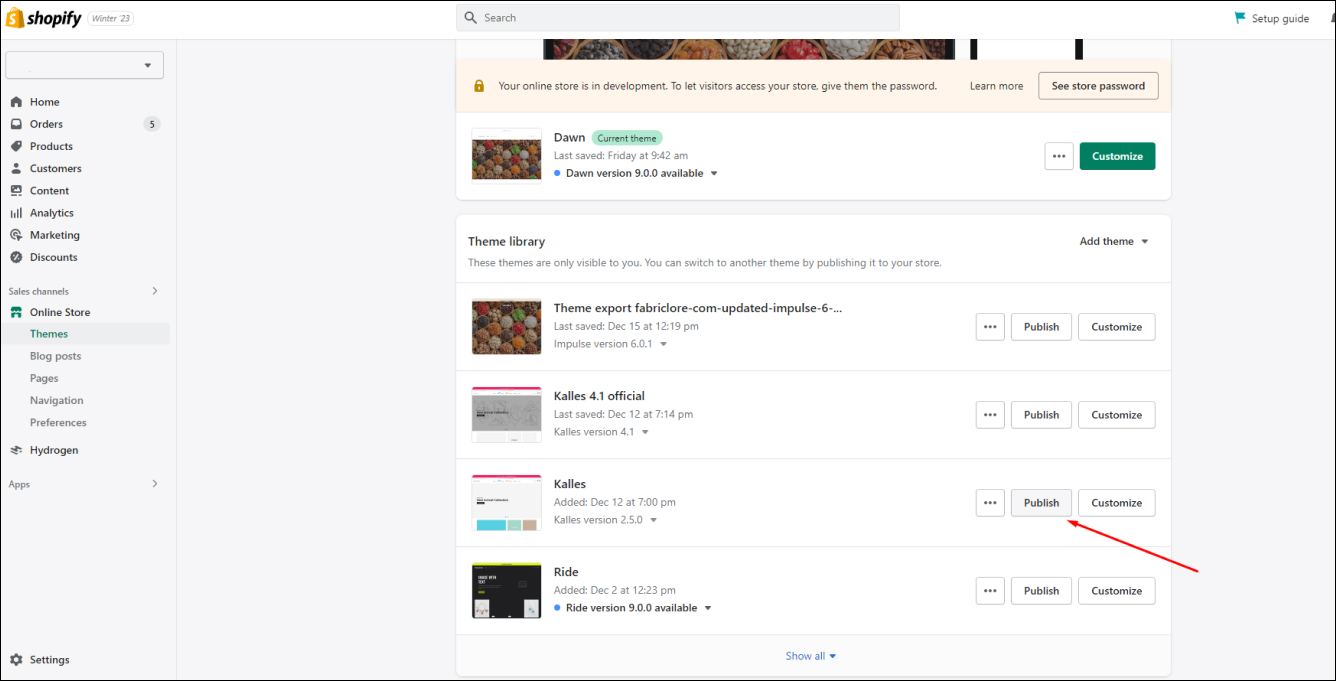 To customize it further, just click on Online Store > Themes > Customize and you’re all good to go!
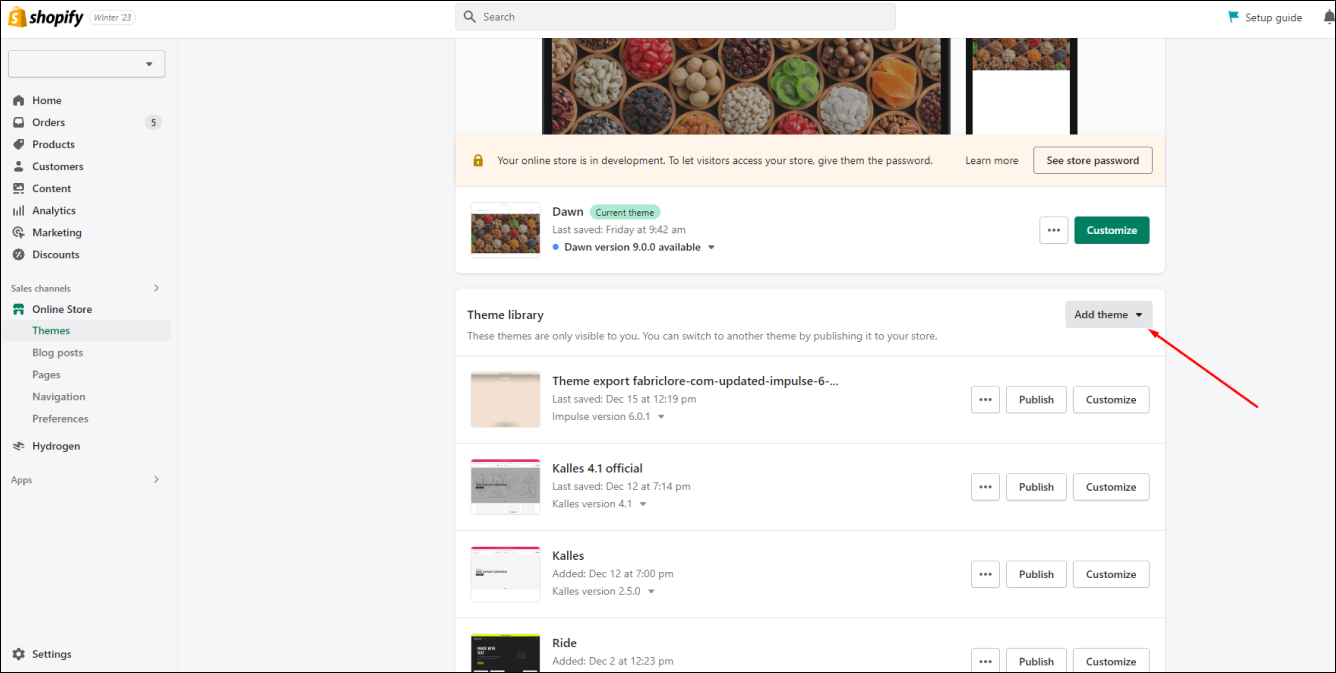
 If you’ve bought themes from any third-party sources or have it developed by Shopify experts, you’ll require to upload them before you customize them. To upload your Shopify theme, go to Online Store > Themes > Add Theme.
Steps to Increase Conversions by Shopify Theme Customization
Running a Shopify store without leads and conversions is just a waste of time, effort, and money. If you aren’t working towards improving your store’s conversions, then it’s a missed opportunity from your end. To help you out with that, here’s a list of steps that can help you increase conversions by customizing the Shopify themes.Step 1: Choose a Theme That Works Best For Your Store
The process of designing your Shopify store begins with choosing the right theme. This decision of theme selection depends upon your niche. There are many industry-specific themes for one to choose from. Shopify offers a few free themes, but other functional themes come with a premium of between $160 – $240. Selecting the right theme for your Shopify store plays a crucial role in the process. You can’t just choose one random theme that seems okay to you. There’s much more involved in it. Those are:- Research your competitor’s store design.
- Know your store design expectations.
- What should be the overall experience of your customers?
- The way you want your products to be displayed on the storefront.
- What additional designs do you want in your store?
Step 2: Tools for Shopify Theme Customization
For most of the Shopify themes, you can customize them using the default Shopify editor. You can edit this by going to the Online Store > Themes > Customize. This way, you can edit the theme the way you want. It allows you to make changes to your theme, which include: switching the images, rearranging the sections, modifying the text style and size, and more. It is much easier and quicker to use than you’ve ever thought.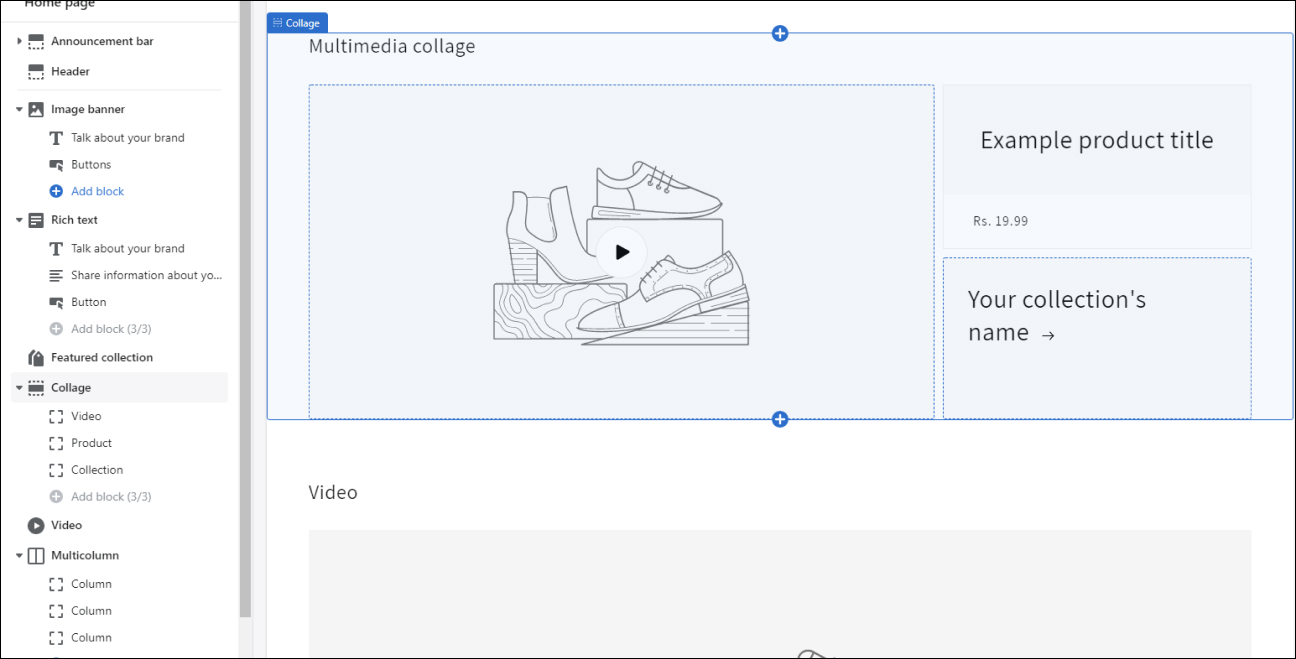
Step 3: Create a High-Converting Landing Page
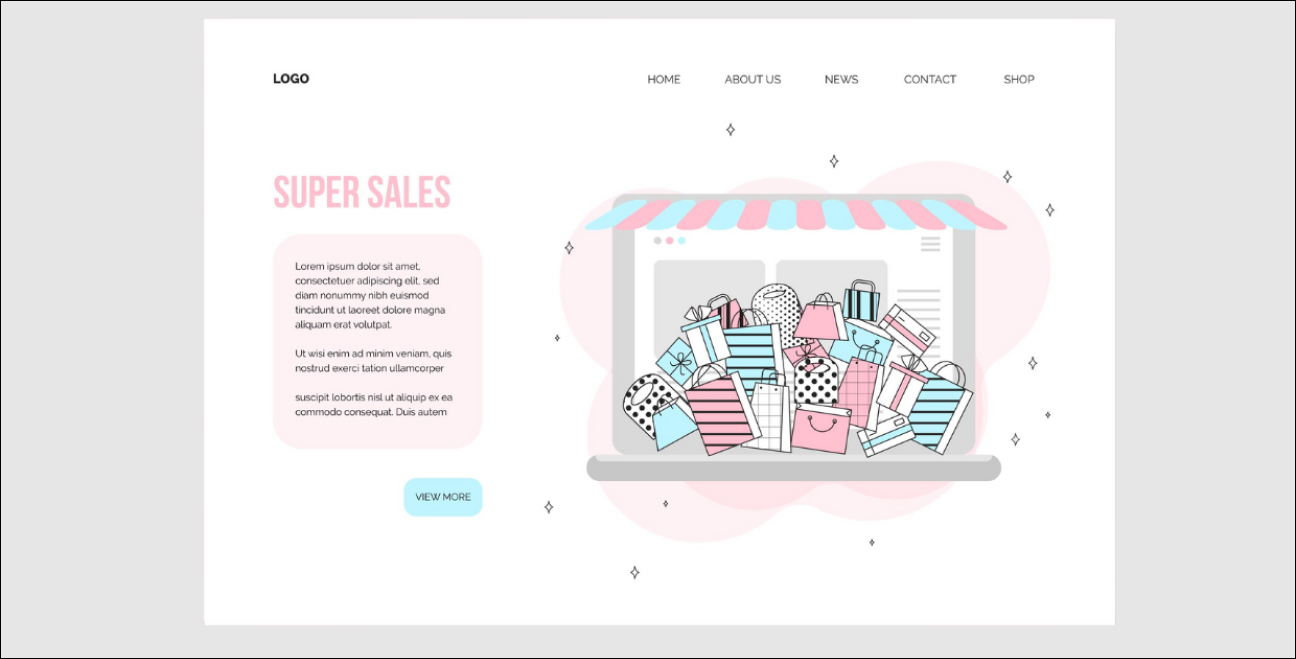
No doubt the landing page would be the perfect place, to begin with! Generally, themes don’t come along with the landing page templates, and even if they come along with them, there are many variables to work in sync. Firstly, you need to set your goal, like what is it about generating sales, gathering emails, or increasing followers; creating a landing page will help you increase conversions. One of the suggested ways of creating a high-converting landing page is using a page builder. Follow all the necessary steps while creating a high-converting Shopify landing page:- Identify your value proposition
- Know who your target audiences are & their desires
- Provide powerful & concise content
- Eliminate the blockers
- Optimize for mobile devices
- Build trust in the customers through social proof & testimonials
- Get SEO optimized site
Step 4: Optimize the Product Pages
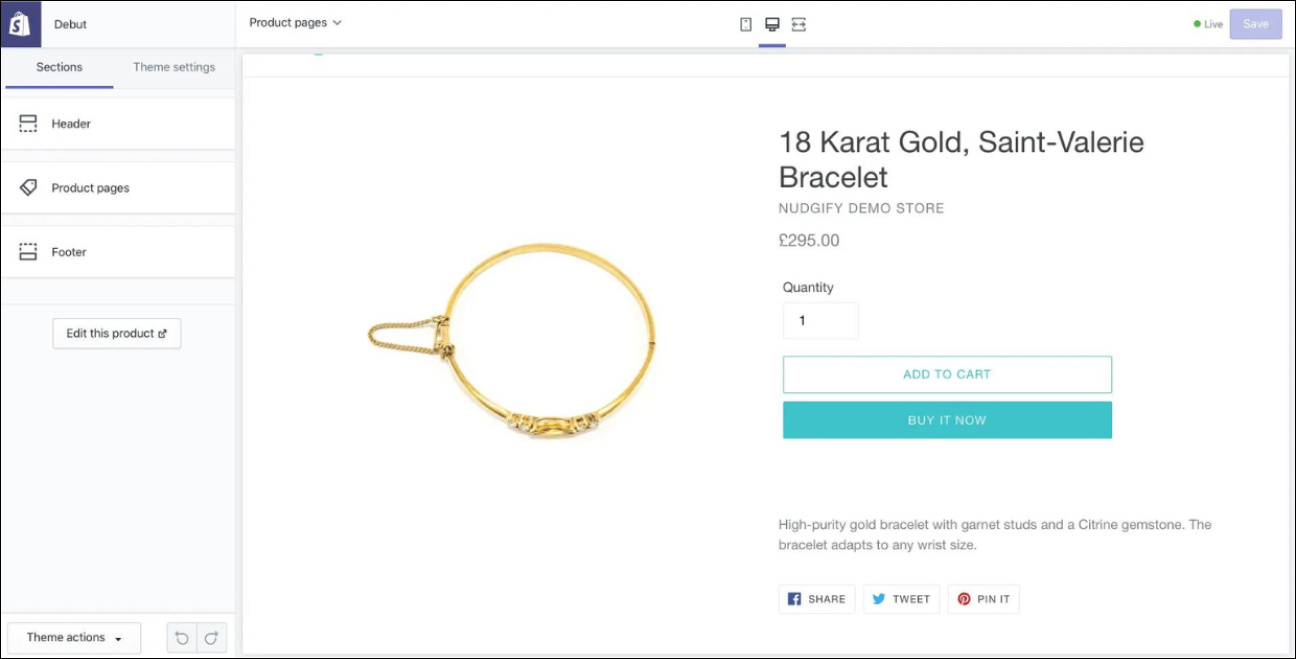
One of the shocking statistics reveals the fact only 0.9% of mobile visitors end up purchasing any product. While the remaining 99.1% of the shoppers leave the store and never return. You must know that if your store’s conversion rate is not three times more than 0.9%, you must know that your product page is failing. To help to avoid this issue from occurring, we have curated a list of factors that you must consider while optimizing the product pages:- It should be an outstanding product
- Must have quality product copywriting
- Add social proof
- Include high-quality visuals
Step 5: Edit the Checkout page & Avoid Cart Abandonment Rate
Do you already own a Shopify store? If yes, then from the Shopify admin page, go to Orders > Abandoned Checkouts. It will enable to you see the number of customers who reached the checkout page and left entirely. This usually happens when your checkout page isn’t optimized by your Shopify theme. Editing the checkout page will help you improve the customers’ experience and reduce the cart abandonment rate. It is one of the effective ways of making changes. To have hands-on it, you can go through our detailed blog for the tips to follow while you build or optimize a Shopify checkout page.
Step 6: Create Shopify’s Thank You Page
Even after your shoppers have made purchases in your store, your job isn’t completed yet. They decided to purchase from your store, and by the time they use your product, your brand will be on their mind. Now, if you offer more offers to them, it might seem attractive, and they might make more purchases from you in the future. To offer the best customer experience to your visitors, you can send them personalized product recommendations on the Thank you page to trigger their buying patterns, or you can even conduct a survey to collect their detailed information.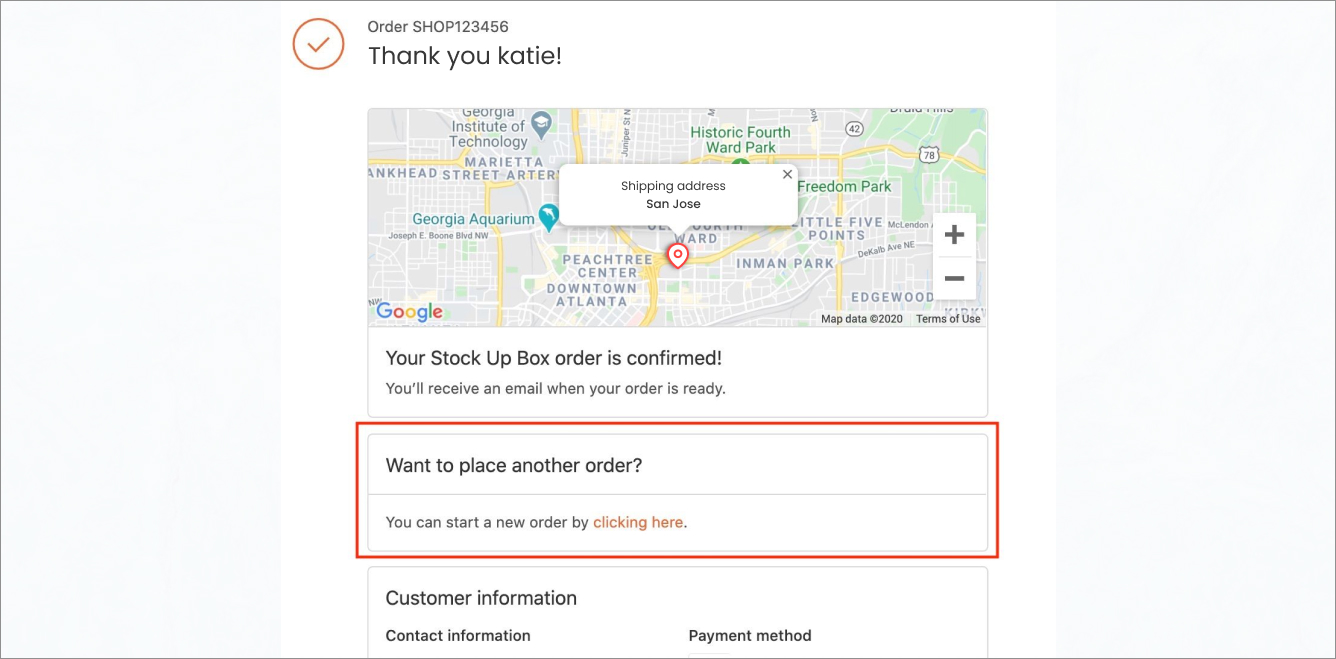
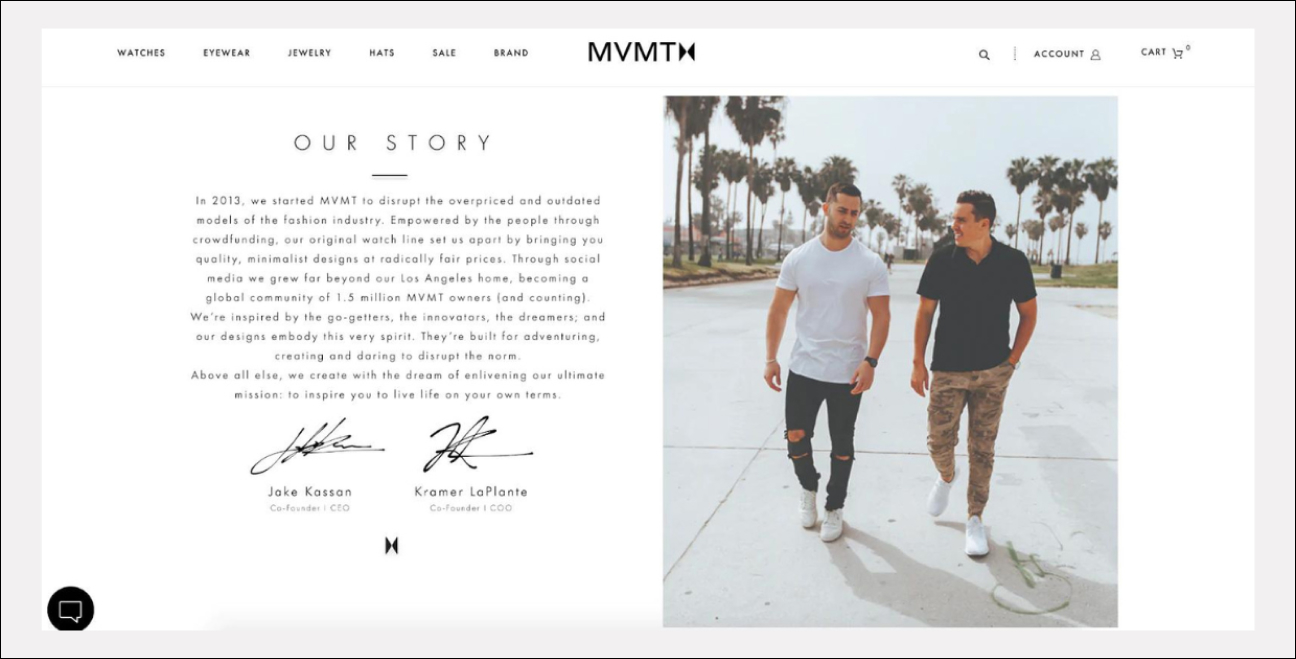
Step 7: Create a Fantastic About Us Page
Now, suppose while browsing through the web, you found an amazing store that offers an appealing range of products, but you haven’t heard of that brand before. Would you make a purchase then? Or, if you want to, how would you know that the brand is trustworthy? You’ll click on the about us page of that store. About Us page is a page where you tell your visitors, and customers get to know details about your brand, how you started, why they must trust you, and in the end, compel them to make purchases from your store. Here are some pro tips that will help you create a fantastic about us page:- Add a picture or video of your store or products
- Describe your business model
- Address problems and give solutions
- Display awards, testimonials, and reviews
- Add social media and CTA
Step 8: Create a “Coming soon” Page for Getting Early Traffic
Designing and developing a new product page for your newly launched product and getting visitors instantly takes time. If you wait till then, you could miss on opportunities to grow your brand and build an audience. Instead of that happening, you can build a “Coming Soon” page for your new and old customers to wait until the new product is launched. It will help you get visitors to your store when you launch the product. Sounds interesting? If yes, then start thinking about customizing your own Shopify coming soon page!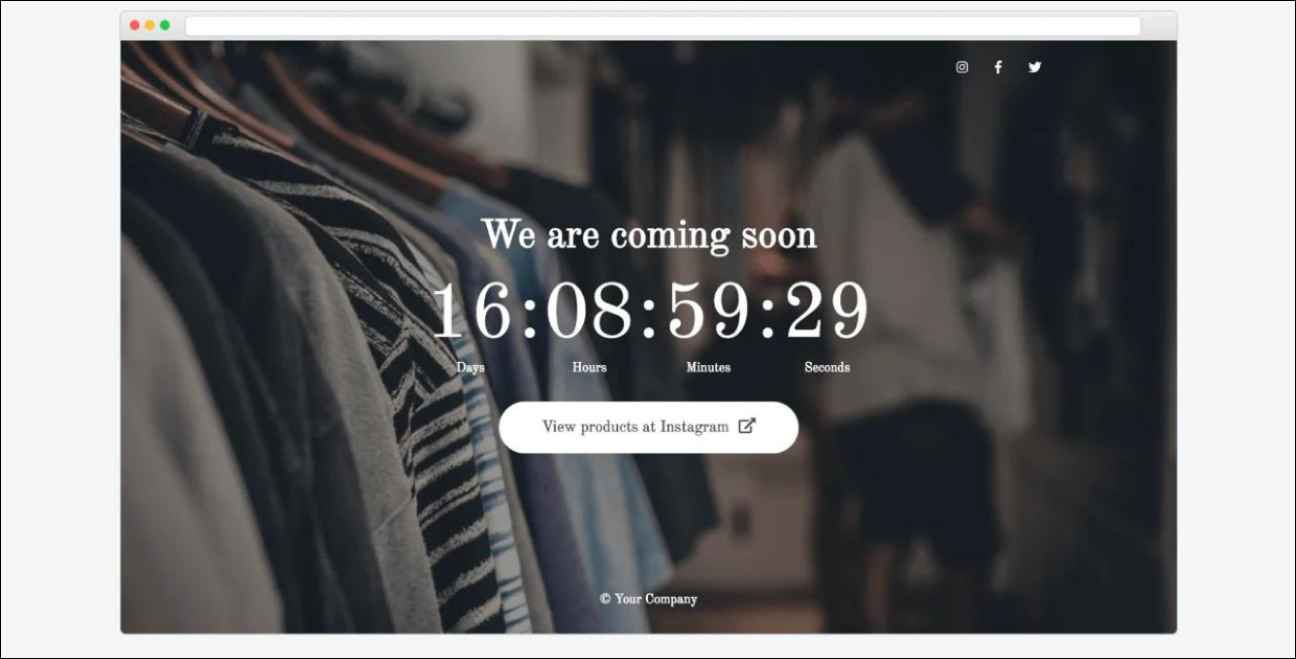
Step 9: Start Blogging on your Shopify Store
Relying too much on the advertisement can eventually lead to fewer visitors someday or the other. One of the solutions to help you, in that case, would be to create a blog page and start to gain organic traffic. One of the best parts about gaining organic traffic is that they’ll stay for a long period. Thus, create more content for your store. It will help you to get more organic search traffic on your store, and chances are some of them will turn out to be your customers. Moreover, creating your blogs can display your trustworthiness in the eyes of your customers. And you won’t miss that opportunity. Would you?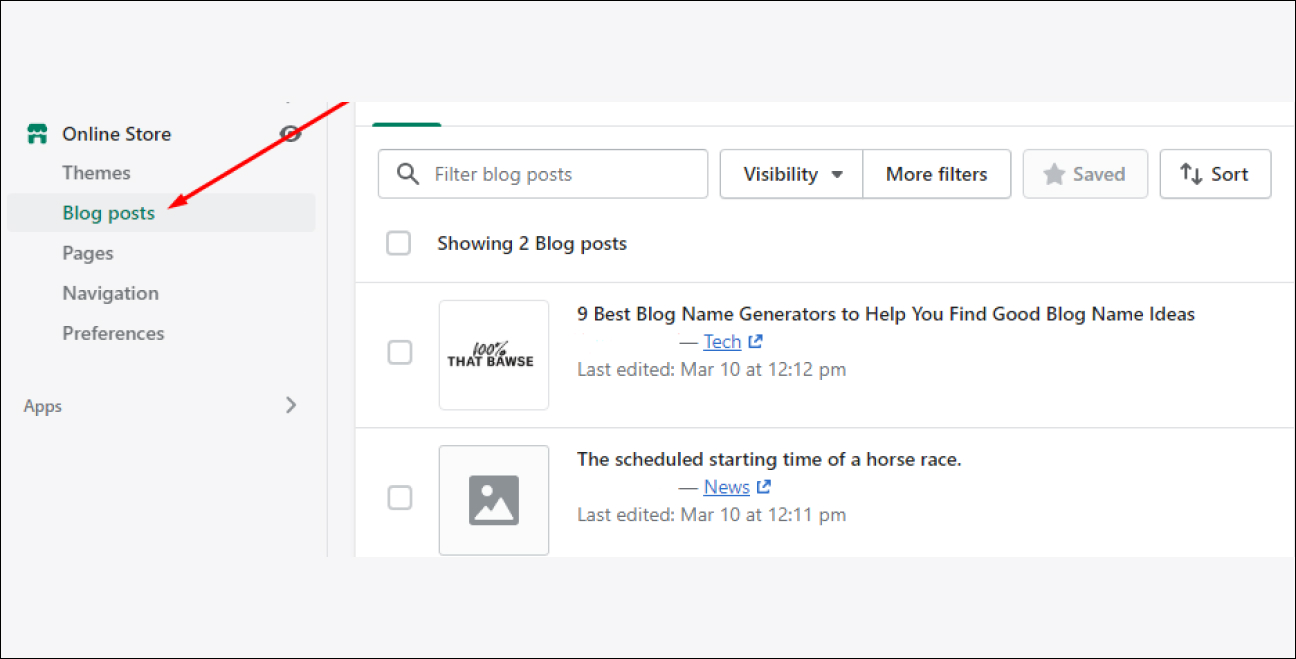
What are Shopify Templates?
Templates in Shopify are referred to each page type in a theme. Each type of page in an online store has an associated sort of template. With that, you can add any custom functionality that makes sense for that page. For instance, you can add reviews to a product template, or even some blog recommendations to an article template. With templates, you can create many versions of the same template type for different use cases. For instance, you can create a product template for makeup products and a separate page template for apparel.Where are templates stored?
The files of templates are located in the templates directory of the Shopify theme:└└── theme
├── layout
├── templates
| ├── 404.json
| ├── article.json
| ...
...
What are the different template file types?
There are two different template file types in a Shopify theme. These templates can be used to build various template types. The two file types for a theme template are:- JSON: JSON templates are marked with the .json file extension that can allow you to create templates with content from the sections. With it, you can easily add, remove, or rearrange the sections.
- Liquid: Liquid templates are marked with the .liquid file extension. It allows you to add HTML codes directly to the Liquid templates. Liquid code needs to be entered in a section linked to a template.
What are templates types in Shopify?
Each template type in Shopify represents a particular type of content in an online store. While creating any page, you need to have a matching template type that you want to render. For instance, if you’re willing to render a product page, you need to have a template of the type of product. If we talk about JSON templates, then you have a maximum of 1000 templates in it across all the template types. For instance, you can create 30 JSON product templates, 15 JSON page templates, and 10 JSON collection templates, then you can create more templates up to 945. Below are some of the template types that you can use in your Shopify store theme.1. index:
The index template is used to render the home page of an online store. It is located at the root URL (/). This is the first page that a customer visits and it marks their first impression. Thus, the index template should consist of various functionalities for online merchants. The index template is located in:
└── theme
	├── layout
	├── templates
	|   ...
	|   ├── index.json
	|   ...
	…
2. page:
The page template is used for rendering the Shopify store’s pages which include About Us or Contact Us. The page template is located in:
└── theme
	├── layout
	├── templates
	|   ...
	|   ├── page.json
	|   ...
	...
3. product:
The product template helps render the product page that includes a brief description of its content, pictures, and videos. It helps the customers to select their variant and add it to the cart. The product template is located in:
└── theme
	├── layout
	├── templates
	|   ...
	|   ├── product.json
	| 	...
	…
4. 404:
The 404 template is used to render a page section or content that is displayed when a visitor or customer clicks or enters an invalid URL for the Shopify store. The 404 template is located in:
└── theme
	├── layout
	├── templates
	|   ...
	|   ├── 404.json
	|   ...
	…
5. cart:
The cart template is used to render the cart page that displays an overview of the content of a customer’s cart page. Well, it is generally shown in the form of a table since it eases out the process. The cart template is located in:
└── theme
	├── layout
	├── templates
	|   ...
	|   ├── cart.json
	|   ...
	…
6. article:
The article template is used to render the article page that includes full content of the post or article. It also contains a comments section for the visitors. It is used for individual posts in an article. The article template is located in:
└── theme
	├── layout
	├── templates
	|   ├── 404.json
	|   ├── article.json
	|   ...
	…
7. blog:
The blog template in Shopify is used to render a blog page that contains all the articles listed within a blog. The blog template is located in:
└── theme
	├── layout
	├── templates
	|   ...
	|   ├── blog.json
	|   ...
	…
8. collection:
The collection template is used for rendering a collection page in an online store. It lists all the offerings (or rather say products) within a collection page. The collection template is located in:
└── theme
	├── layout
	├── templates
	|   ...
	|   ├── collection.json
	|   ...
	…
9. list-collections:
The list-collection template is used to render the page where all the store’s collections are listed. It is located at the /collections URL of the Shopify store. The list-collection template is located in:
└── theme
	├── layout
	├── templates
	|   ...
	|   ├── list-collections.json
	|   ...
	…
10. password:
The password template is used to render the password page in the online store. Basically, it is a page that is shown when password protection is applied to any Shopify store. It contains a text or message that is editable by the Shopify merchants and the password form for the visitors or customers to access the store. The password template is located in:
└── theme
	├── layout
	├── templates
	|   ...
	|   ├── password.json
	|   ...
	…
11. robots.txt.liquid:
The robots.txt.liquid renders the robots.txt file that includes data for the search engines of which pages to be or not to be crawled by the bots. It is hosted at the /robots.txt URL. Well, Shopify generates a robots.txt file by default, and thus, it isn’t included in any themes. This file contains a set of rules and regulations, such as: The user-agent which includes notes for the bots. For instance, adsbot-google. A note which contains specific URLs that bots can or cannot access. A sitemap URL of the store (it’s optional). The robots.txt.liquid template is located in:└── theme
├── layout
├── templates
| ...
| ├── robots.txt.liquid
| ...
...
- Login to your Shopify admin panel. From there, go to the Online
- Store and select Themes.
- Go on and select the theme you wish to edit. Click on Edit Code.
- Scroll through the left side panel. Under the Templates heading, click on Add a new template.
- In Create a new template, select robots.txt.
- Lastly, click on Create template.
12. search:
The search template renders the search page of the store that showcases the outcomes of the store’s search. The search template is located in:
└── theme
	├── layout
	├── templates
	|   ...
	|   ├── search.json
	|     ...
	…
13. customers/account:
The customers/account template is used to render the customer account page that gives a detailed overview on the customer’s account.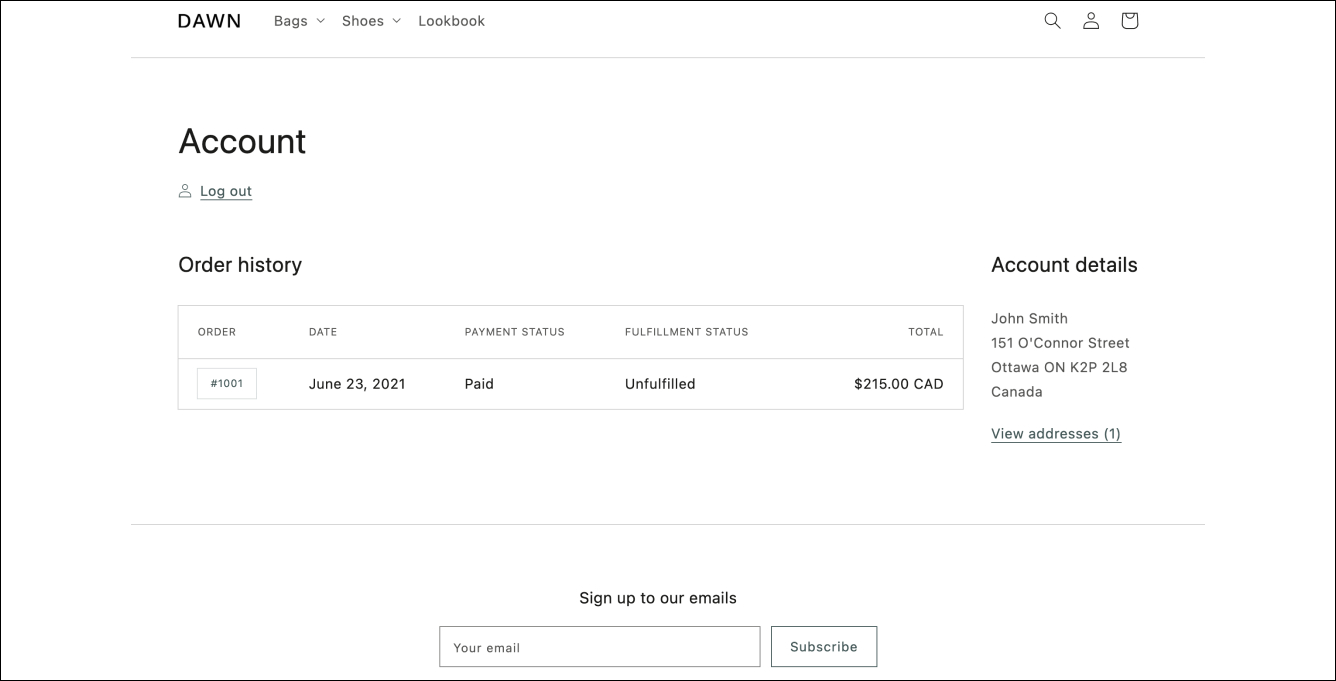 The customers/account template is located in:
└── theme
	├── layout
	├── templates
	|   └── customers
	| 	├── account.json
	| 	...
	…
14. customers/activate_account:
The customers/activate_account is used to render the customer account activation page that includes a form for activating the customer account. The customers/activate_account template is located in:└── theme
├── layout
├── templates
| └── customers
| ├── activate_account.json
| ...
…

15. customers/addresses:
The customers/addresses template renders the page where customer enters their address. Also, it enables them to view and manage their saved addresses and add new addresses.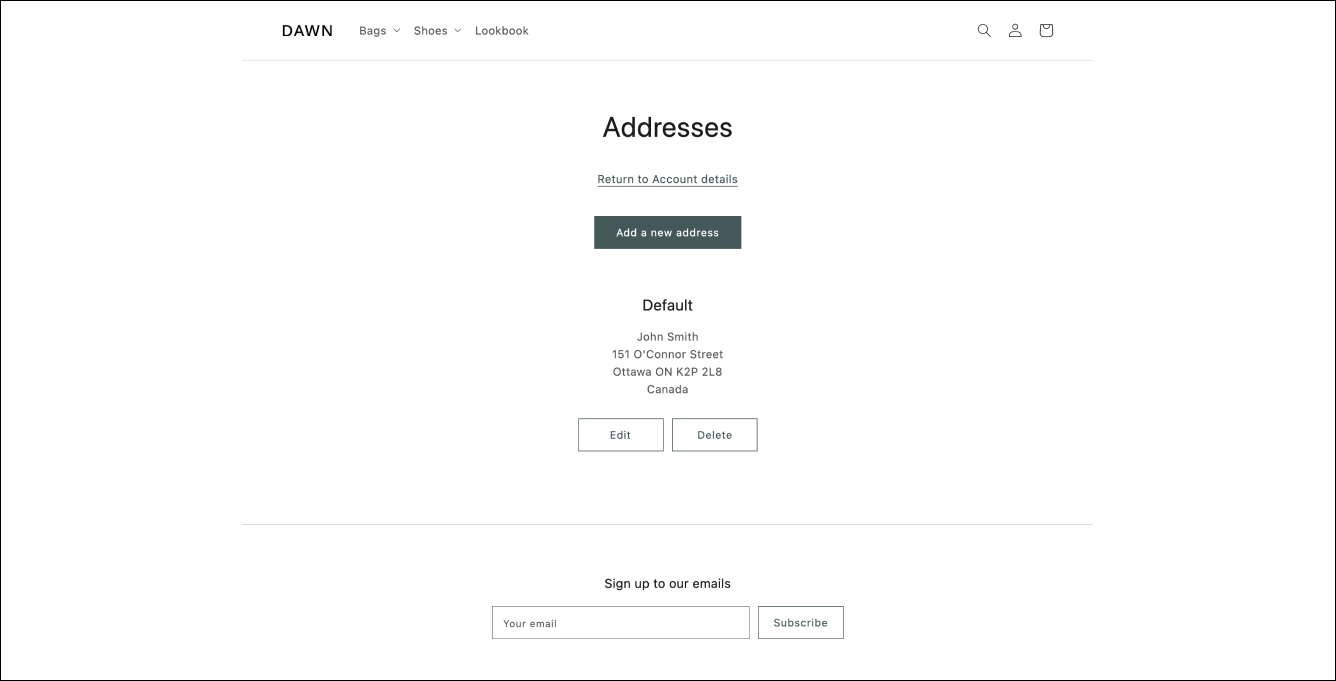 The customers/addresses template is located in:
└── theme
	├── layout
	├── templates
	|   └── customers
	| 	├── addresses.json
	| 	...
	…
16. customers/login:
The customers/login template is used to render the login page for the visitors or customers. It displays the login form for the customer account. The customers/addresses template is located in:
└── theme
	├── layout
	├── templates
	|   └── customers
	| 	├── login.json
	| 	...
	…
17. customers/order:
The customer/order is used to render the customer order page that showcases the brief of a customer’s past and current orders. The customer/order template is located in:
└── theme
	├── layout
	├── templates
	|   └── customers
	| 	├── order.json
	| 	...
	…
18. customers/register:
The customers/register template renders the customer register page. It includes a form for the customer account creation. The customers/register template is located in:
└── theme
	├── layout
	├── templates
	|   └── customers
	|     ├── register.json
	|     ...
	…
19. customers/reset_password:
The customer/reset_password template is used to render the password reset page. It includes a form for resetting the password of a customer’s account on the store. The customer/reset_password template is located in:
└── theme
	├── layout
	├── templates
	|   └── customers
	|     ├── reset_password.json
	|     ...
	…
20. gift_card.liquid:
The gift_card.liquid template is used to render a gift card page that showcases a gift card being issued to a customer upon buying anything from the store. The gift card pages are hosted on checkout.shopify.com domain. The gift_card.liquid template is located in:
└── theme
	├── layout
	├── templates
	|   ...
	|   ├── gift_card.liquid
	|   ...
	...
DO’s & DON’Ts of Customizing Your Shopify Theme
No doubt Shopify is one of the best e-commerce platforms that can help you create a custom storefront for your visitors or customers. Still, there are some of the Dos and Don’ts that you need to keep in mind before you begin customizing your Shopify theme.1. DO Keep Backups of your Current Shopify Theme:
Firstly, you need to back up your current storefront before you get into Shopify theme customization. This step is vital, especially if you have a running or live storefront. Duplicate your current live theme such that you can revert to the previous version if needed. To back up your current theme, you need to duplicate it before you make any necessary changes. To do this, go to your Shopify admin area and scroll down to Online Store > Themes. Then, click on the “Actions” and from the dropdown menu, click on “Duplicate”. These steps will duplicate your theme and will be saved in the “Themes Library” section. You need to know that any changes that you make on the way might not work out as you thought them to be. Thus, your backup can help you get back to the changes that you earlier made. It will save your time and regrets in the future.
2. DO NOT Forget to Test Run:
Once you’ve made the necessary changes in your Shopify theme, the next important step that you need to perform is to conduct a test run. It will help you see how the modifications can affect your visitor’s or customers’ shopping experience on your online store. You can even play around with your store’s images. To test run your store after the changes, preview the theme. It will show you how the theme changes will look on your online store without needing to make it live. To preview your theme, go to the Online Store > Themes. Then, click on the “Actions” from the dropdown menu, and hit on Preview.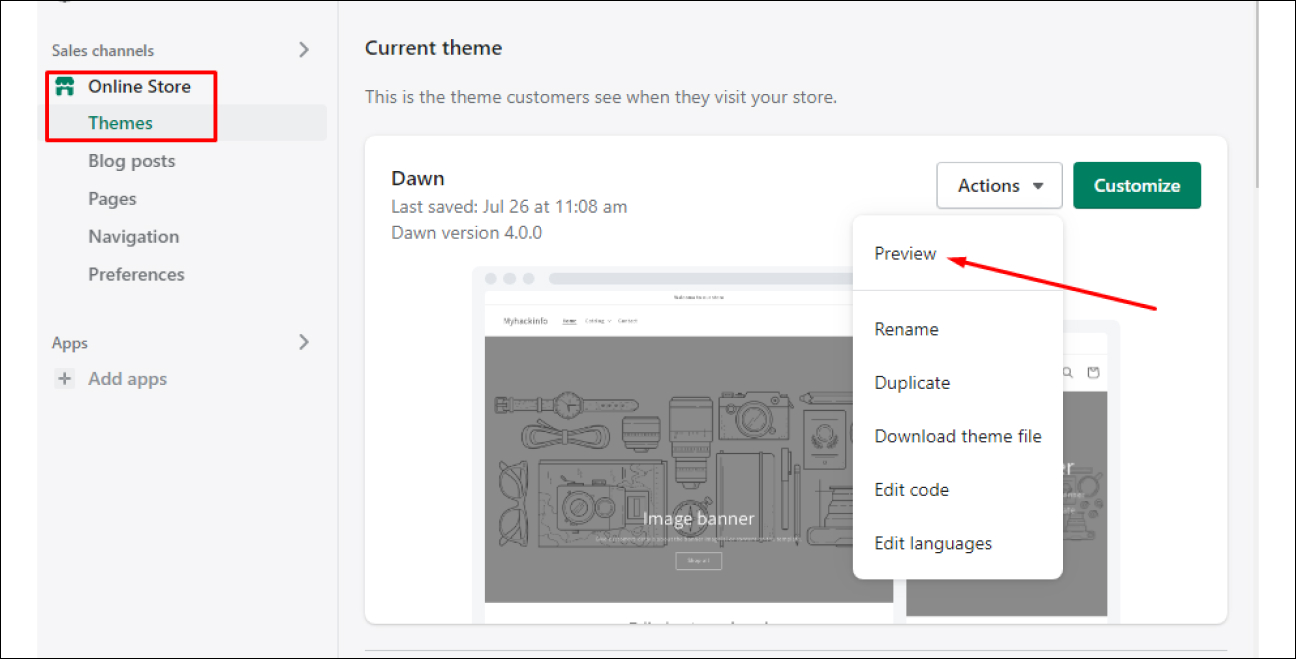
3. DO Proper Research on Shopify Theme Customization:
You must spend considerable time researching successful e-commerce stores. By researching, you’ll get a bundle of ideas on what you can do on your site to make it more visually and aesthetically appealing to the visitors. You can check out some famous brands like Nike, Adidas, Apple, and more to have an idea of what they’re doing to grab the attention of customers on their site. It doesn’t mean that you need to copy their ideas. Instead, get an idea and focus on improving your Shopify store by making your brand unique. If you’re looking to hire a third-party Shopify theme customization developer, reach out to them and discuss your project in detail. If you find the discussion suitable enough, and reliable, you can then hand over your project to them without any delay.
4. DO NOT Underestimate the Image Requirements & Best Practices:
Well, you can use any type of image in your Shopify theme. Still, you must understand the Shopify image requirements that you’re using in your store. Basically, you can use JPEG, PNG, GIF, and HEIC format images to create images like banners, slideshows, and product listings. Consider the below-mentioned points while creating images for your Shopify store:- The product images should emphasize more on the product more.
- The background images of the product shouldn’t contain any form of text.
- Keep background and slideshow images quite simple such that it helps in displaying the overlaying text.
- Remember to crop the wide images to be used on tall screen resolutions and vice versa.

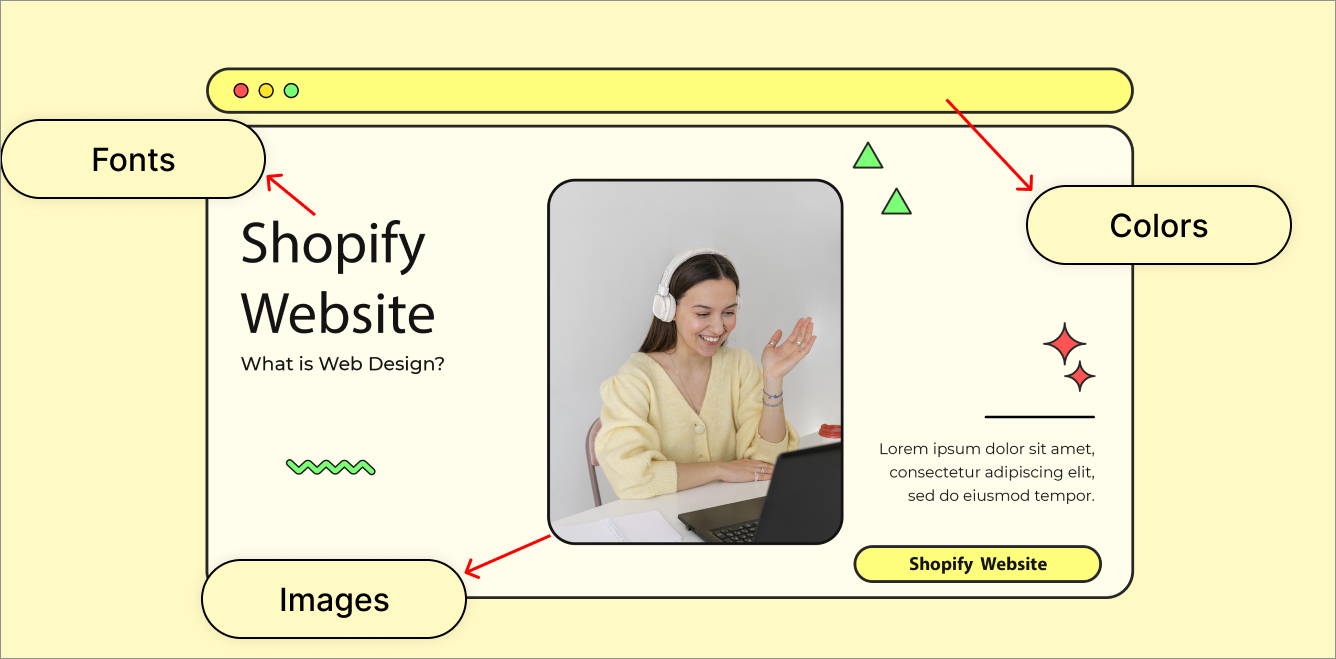
5. DO Maintain Consistency on Colors, Fonts, & Images:
Choosing the perfect set of colors, fonts, and images for your Shopify store may be a tedious task on various levels. From color coordination to the perfect set of fonts, every step requires a lot of attention. However, many rules can help you out in that case:- While you choose fonts for your Shopify store, ensure that you do not use more than three fonts.
- Not only does the font style matter, but font size also matters. Use font size in regard to the content.
- Ensure that the product images you upload must be of high resolution and are of at least 1024px by 1024px resolution.
- Give a consistent and symmetrical look to all the images that you upload on your pages.
6. DO NOT Settle for a Cheaper Developer for Customizing your Theme:
Nowadays, you can easily find freelancers who can offer you the cheapest and fastest development services. But, you need to look for a reliable and skilled Shopify developer for customizing your store’s theme. Many providers are offering cheap services leaving Shopify merchants with poor or incomplete theme customizations. Hence, you must look out for reputable Shopify developers who provide you with an estimate of the timeframe of project completion and price before you hand over their money.
7. DO Keep Track of the Files That You Change or Update Recently:
We understand keeping a written record of all the changes or updates made to your theme may sound to be a tedious task, but it can turn out into a highly valuable resource if you wish to get back certain steps or try to find the main culprit behind an issue. It can be just in the form of a document with notes and with a who-what-when-how-why summary of the changes made. It can prove to be an asset for you to track down the changes when you’re working in a huge team.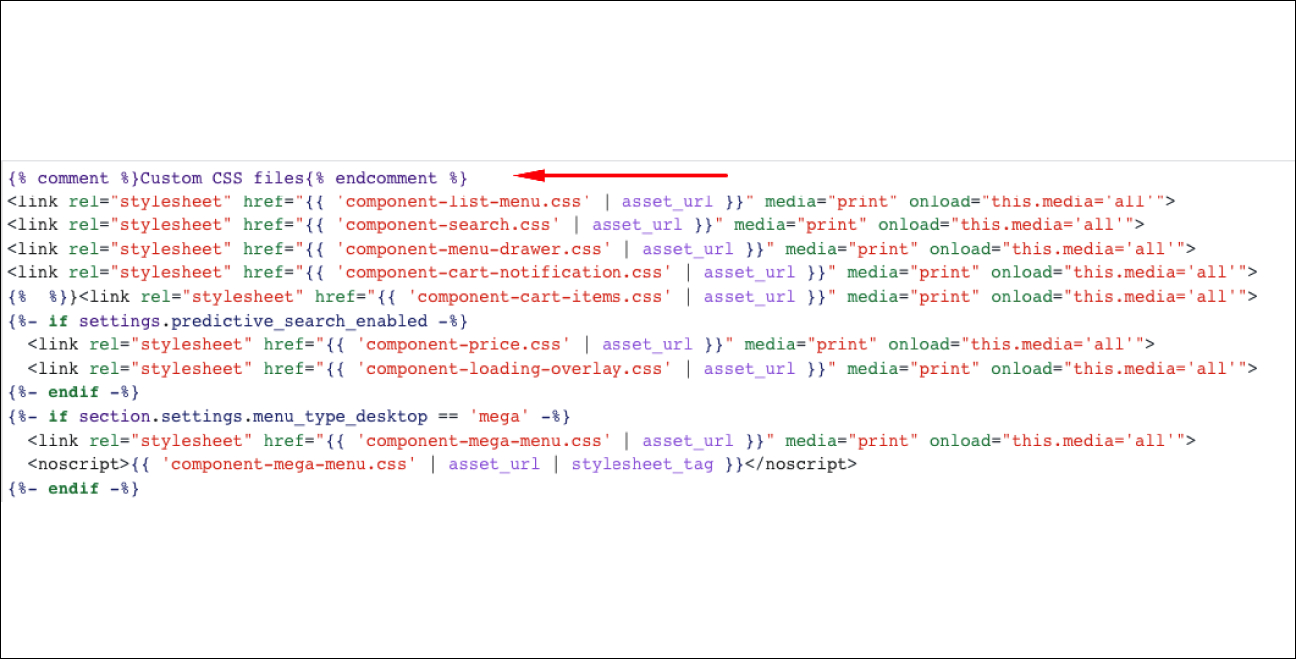
Let’s do it!
We’ve all been customers before sooner or later. So, take a step ahead, look through the customer’s shoes, and think whether or not you would make a purchase from a particular online store or not. Now that you have a list of steps and an entire guide, you can start your Shopify theme customization to achieve a high conversion rate for your online store. All you have to do now is to let your creativity flow and create a store that lets you gain more leads and conversions. And if you have any questions in mind, please do share them below in the comments section! Also, if you need custom Shopify theme customization, reach out to our Shopify developers today! What’s Next?15+ Best Shopify Themes to Boost Conversion Rates
Related: Looking for professional help? Explore our professional Shopify theme customisation services.