Over the past few years, Shopify has been continuously working towards easing the task of customizing the store’s look and feel.
At Shopify’s Unite in 2021, the experts announced the biggest update ever, they introduced Online Store 2.0.
This update consists of excellent functionality and feature that made theme editing an easy task for the Shopify merchants as well as for the developers.
One of the biggest parts of this update was the introduction of new themes that allowed adding and customizing sections on every page template instead of just on the homepage.
Sections are the most important tool that can be used to customize your Shopify store. So, here’s a full blog devoted fully to Shopify Sections. By the time you reach the end of this blog, you’ll be prepared to create a section all by yourself.
So, without further delay, let’s get started!
What are Sections in Shopify?
Sections are customizable elements within the page templates that you can add, remove, or reorder to create the desired layout for your Shopify store.
Sections were introduced in the e-commerce market in 2016 with a motive to help Shopify merchants create code-free sections in the theme.
Within the code and theme editor, each section can be customized to the extent that is allowed in the theme. This way, you can quickly add or modify the headings, text, colors, images, and more and view a real-time preview of the modification made so far.
With the introduction of sections, all the page templates allowed customization for sections not only for reordering or rearranging them but also for changing the layout.
What can Shopify Sections be used for?
Shopify Sections is a feature that allows merchants to customize the layout of their online store’s homepage using pre-designed blocks of content. These can be used to display products, collections, text, images, and more.
Some examples of what sections can be used for include:
- Displaying featured products or collections
- Creating a slideshow of images
- Adding a video or map to the homepage
- Creating an image gallery
- Adding an “About Us” section
- Including social media feeds
- Creating a newsletter signup form.
Shopify merchants can use sections to create an engaging and personalized shopping experience for their customers.
How to Add Custom Sections in Shopify?
If you have a custom code section ready for your Shopify theme, adding it through the code editor is way simpler and easier.
So, let’s go through the steps of how you can add custom sections with code!
Step 1: Go to Sections in the Code Editor
From the Shopify dashboard, go to Online Store > Themes > Edit Code.
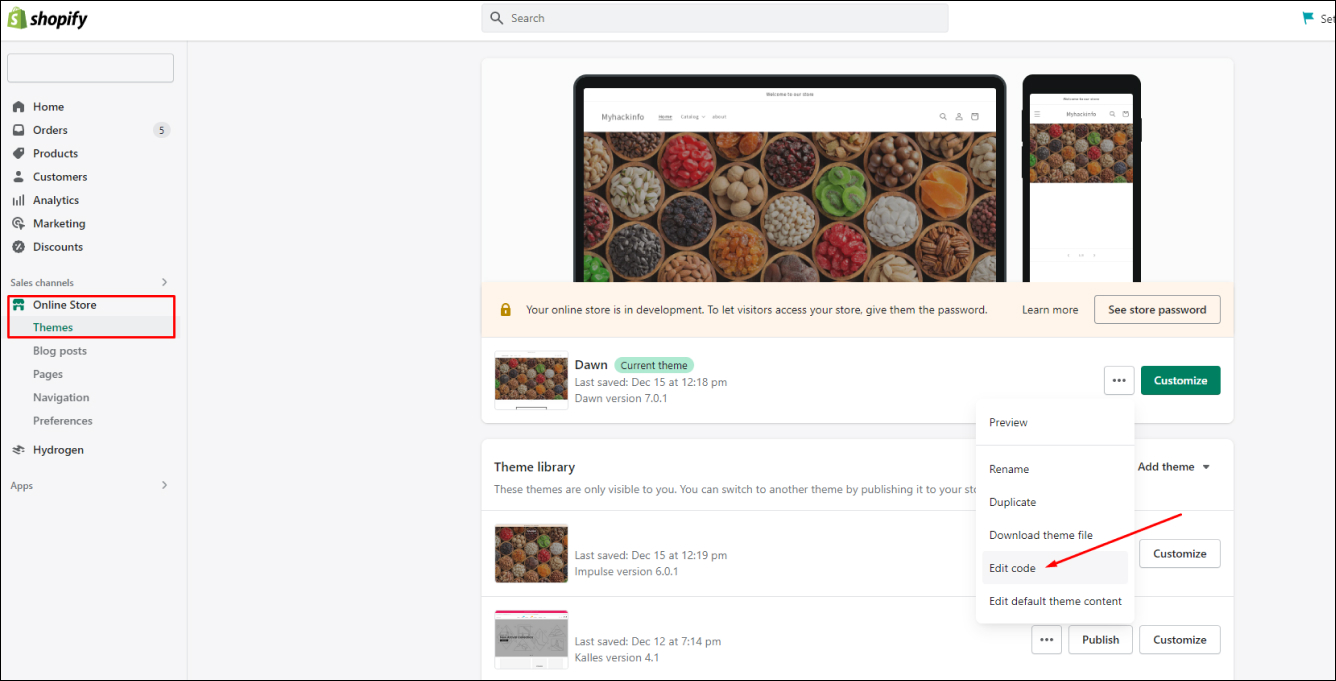
Scroll down to the Section folder in the code editor.
Next, click on Add a New Section.

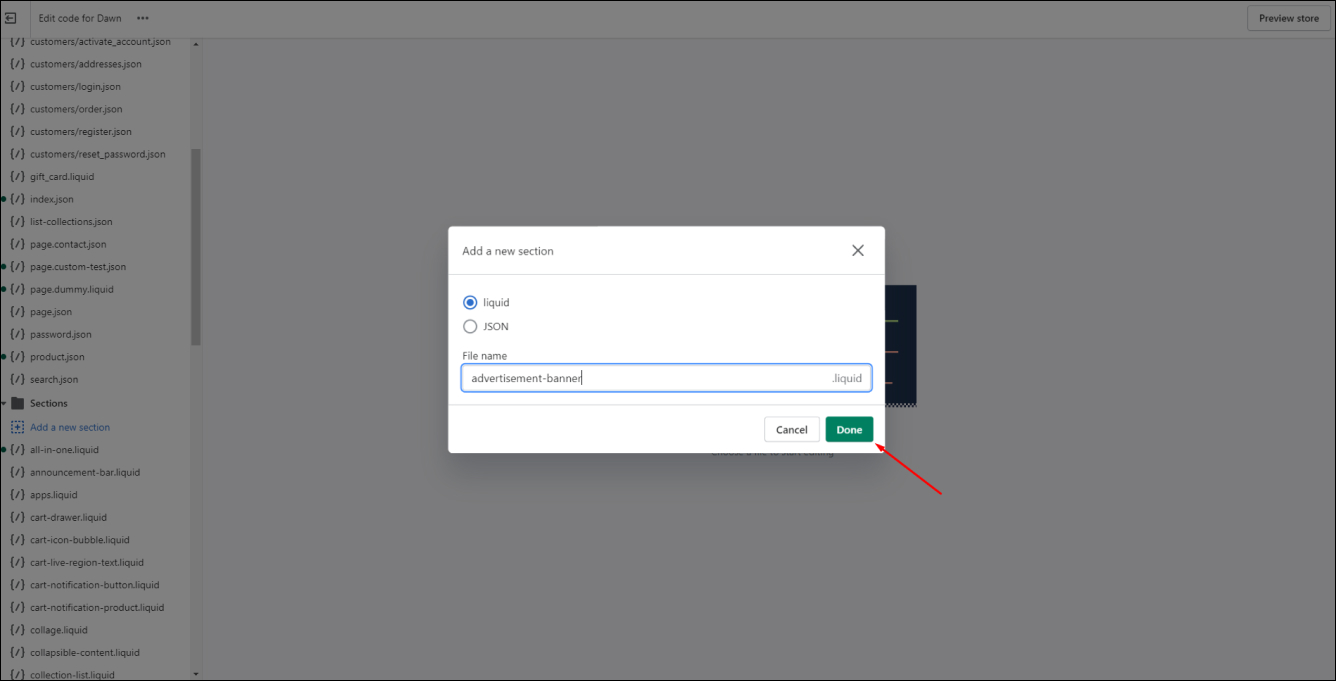
Step 2: Name the Section
Next, you need to give a name to the section you’re creating. For instance, if it’s for the banner, then assign that name to the new section. Keep in mind that you add hyphens and no gaps between the words.
When done, click on Create Section.
Step 3: Add in the Custom Liquid code
When you click on Create Section, you’ll be directed to a template with space to add your section schema, CSS stylesheet, and JS.

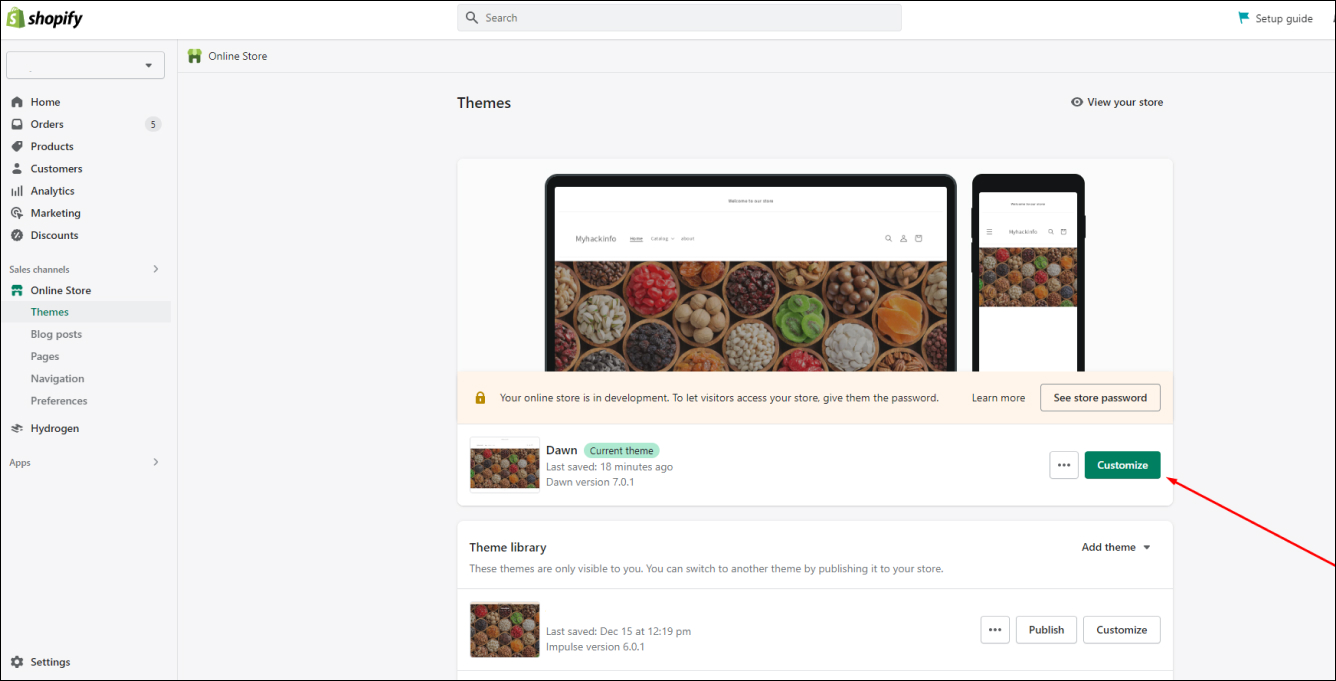
Step 4: Add Custom Section to Page Templates
Now, move on to the theme editor through Customize option.
To add the create section, click on Add Section.

Search for the section name that you created in the code editor. Here, I’m searching for “Banner”. Click on it!
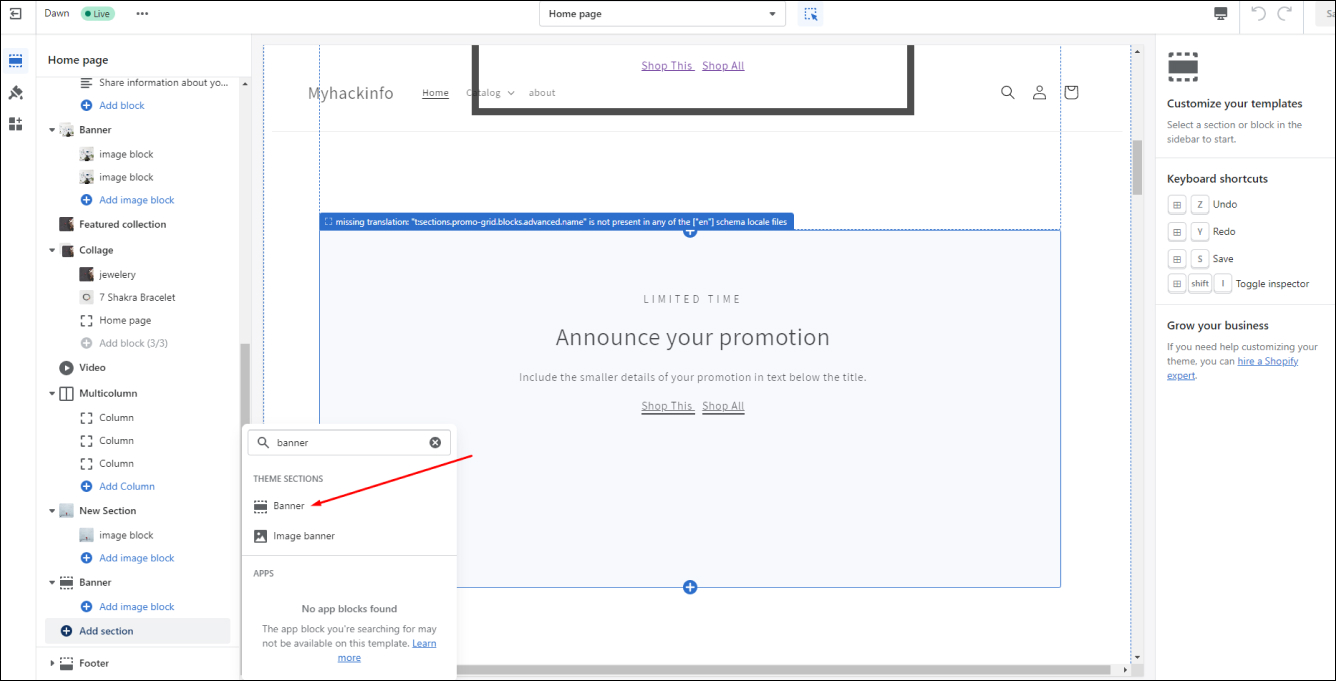
From here, you can customize the section according to the code that you’ve entered in the code editor. For instance, here I’ll enter the heading, and subheading, and give different colors to the heading.
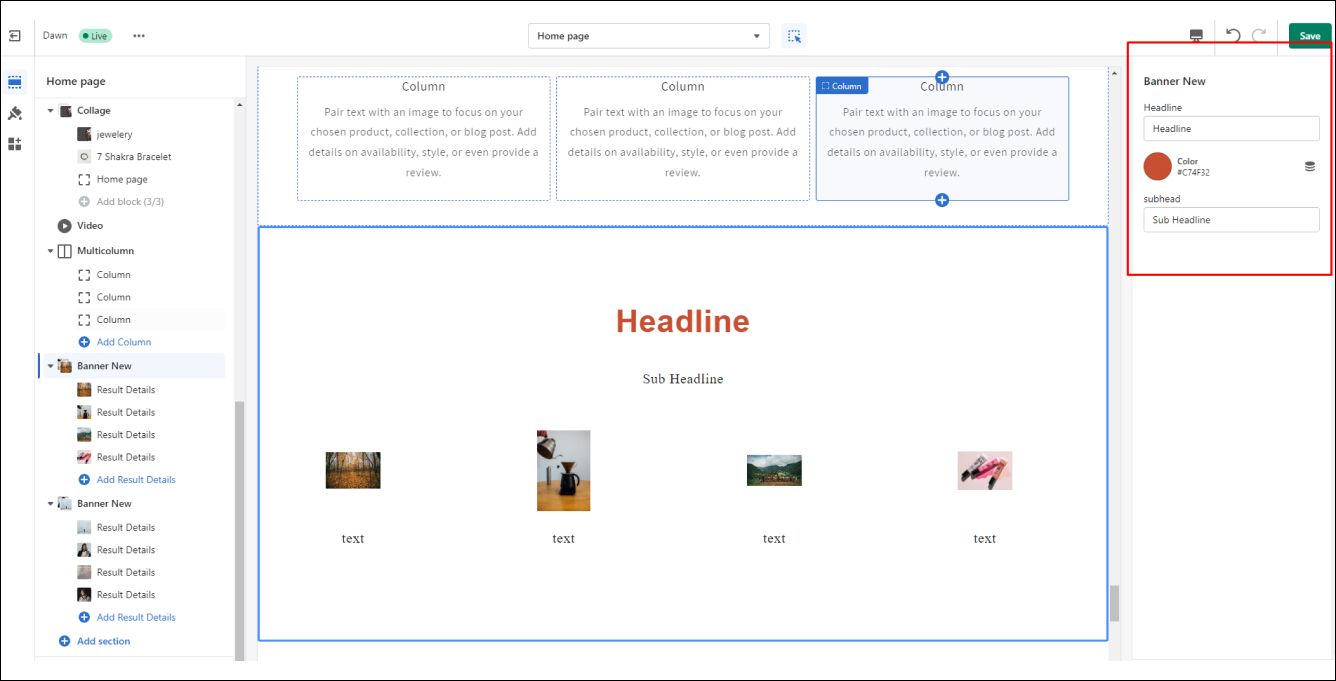
Lastly, click on Save!
That’s how you can add custom sections through code!
How to Add Custom Sections in Shopify Without Coding?
Shopify allows adding merchants to create default sections in the page templates like any other native theme section without coding.
Let’s get into the steps of creating custom Shopify sections without coding.
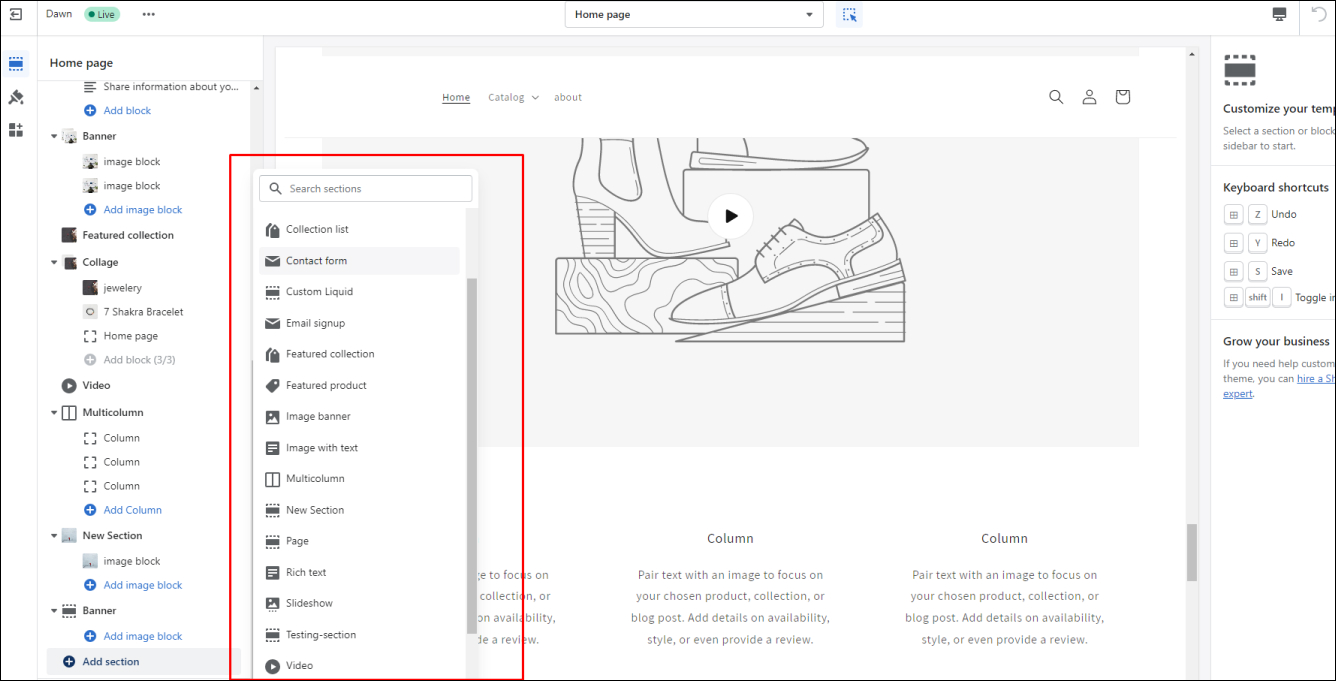
Step 1: Navigate to the Theme Editor
From the Shopify dashboard, go to Customize.

Step 2: Click Add Section
Scroll down to find Add Section button, and click on it. Select one of the default sections from the list.
Here, we are adding a video section.
Step 3: Start Creating & Customizing Custom Section
Now, all you need to do is customize the custom section according to your requirements.
For mine, I added a video highlighting Shopify.
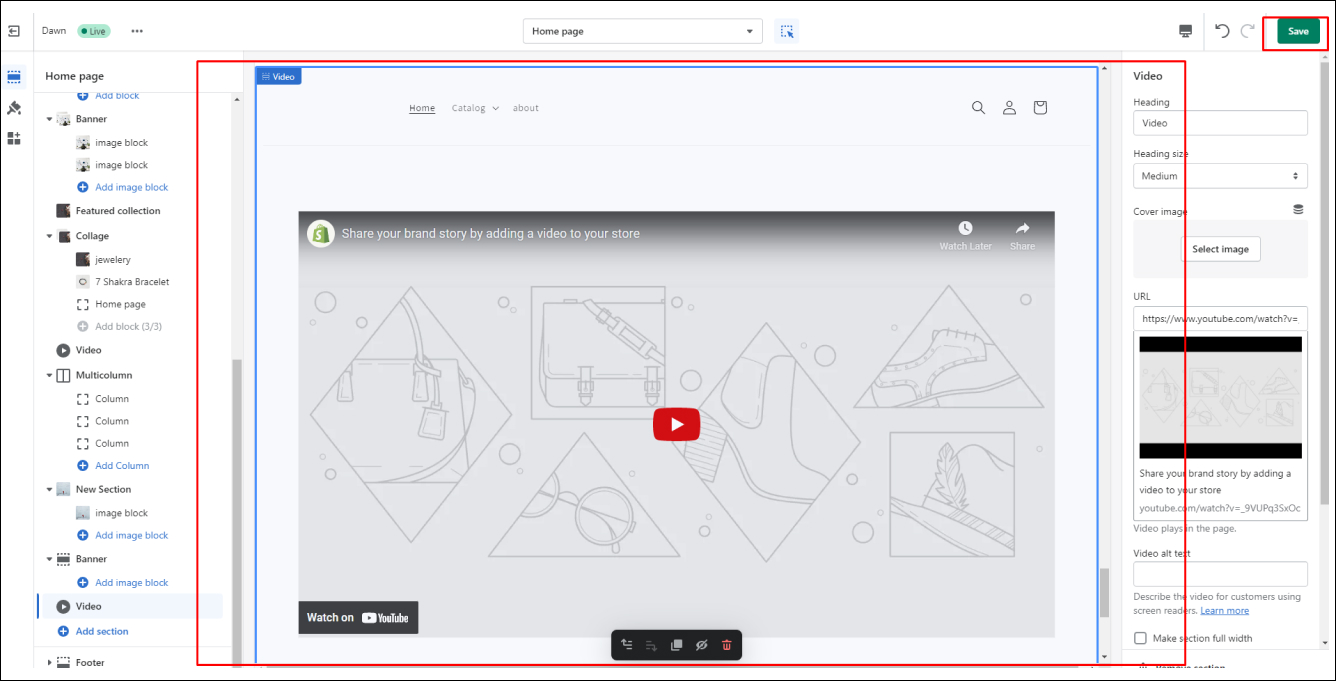
That’s it! It was as simple as it seems to be!
Wrapping Up
Creating custom sections in Shopify can allow you to go beyond what the majority of Shopify merchants can’t do.
And with the introduction of sections on every page, was considered as a big win for many Shopify merchants who wanted to customize their stores in a way that can drive results.
Adding pre-built sections to any page and being able to rearrange them to design your layout is the key to giving unique and enriched customer experiences.
But, utilizing pre-built sections cannot help you offer a unique experience to your customers.
That’s where creating custom sections through code comes to play.
You have all the required steps in the blog that can help you create totally unique sections. But, if you aren’t familiar with coding and require help from the experts, you can reach out to us in that case.
Our Shopify developers have years of experience in this field and they can help you create unique sections the way you want for your store.