Every individual business, whether it is physical or digital, shares a common objective, that is, to offer the best customer experience. It is dependent on how unique and personalized experiences you can create for them.
To offer a personalized user experience to the customers, you need to gain customer data. And this was the main reason behind the introduction of Shopify customer metafields. With it, you can store custom data about your customers and use them to improve the user experience.
Here’s a blog that can help you gain knowledge about the Customer metafields in Shopify. By the time you’ll reach the end of this blog, you’ll know how to create and display the Shopify customer metafields.
What are Customer Metafields in Shopify?
Shopify customer metafields are used to store additional details about your customers in your online store. Shopify provides limited options to store customer information. But, you can extend the limitations by using Shopify customer metafields.
Some of the examples of customer metafields in Shopify include emails or contact numbers, profile pictures, and more.
How to Create Customer Metafields in Shopify?
To create custom metafields in Shopify, you need to begin by defining the Customer metafields. Let’s begin with the steps!
Steps to Create Collection Metafield Definition
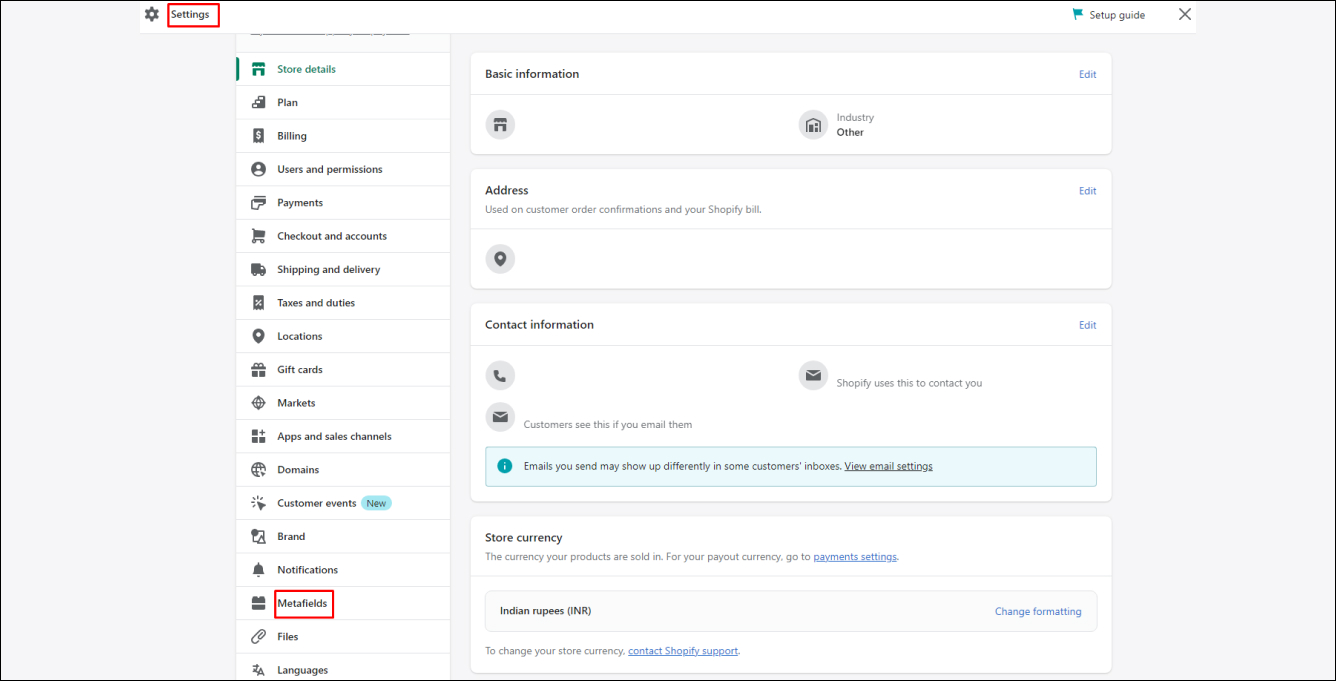
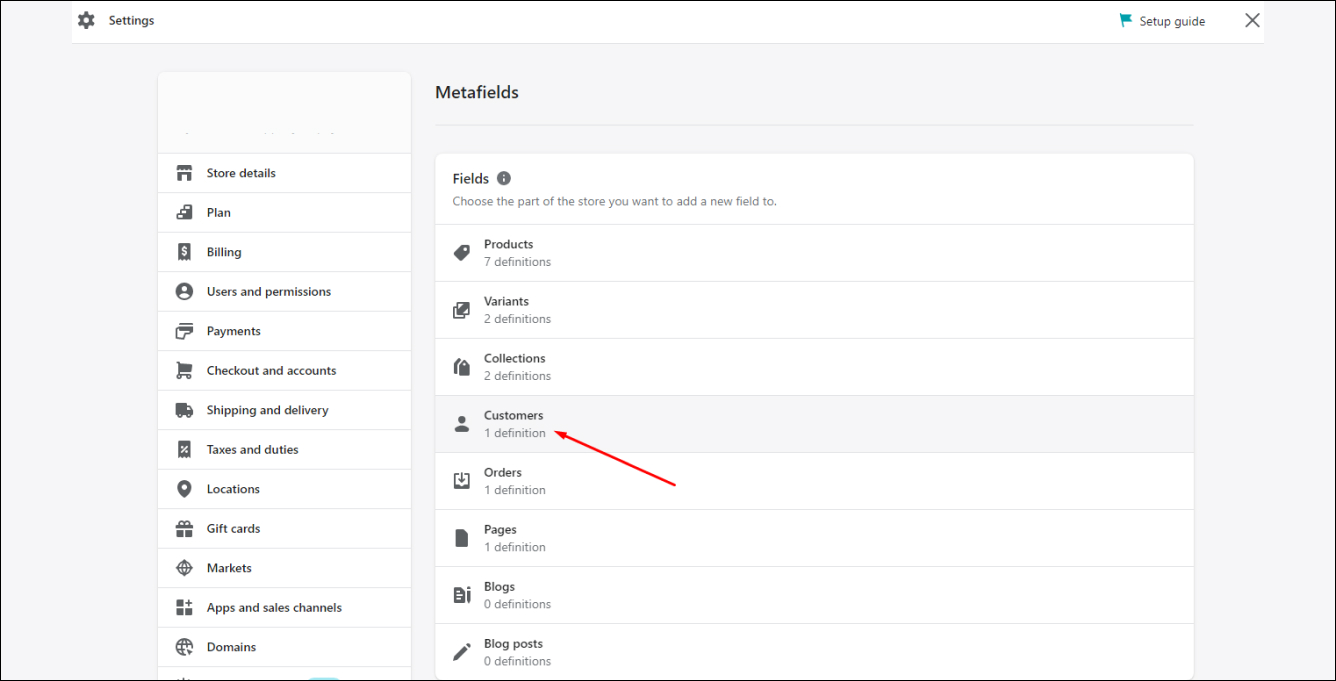
Step 1: Once you’re logged in to your Shopify admin panel, go to Settings > Custom data > Metafield definitions.
Step 2: From the list of metafields types, choose Customers.
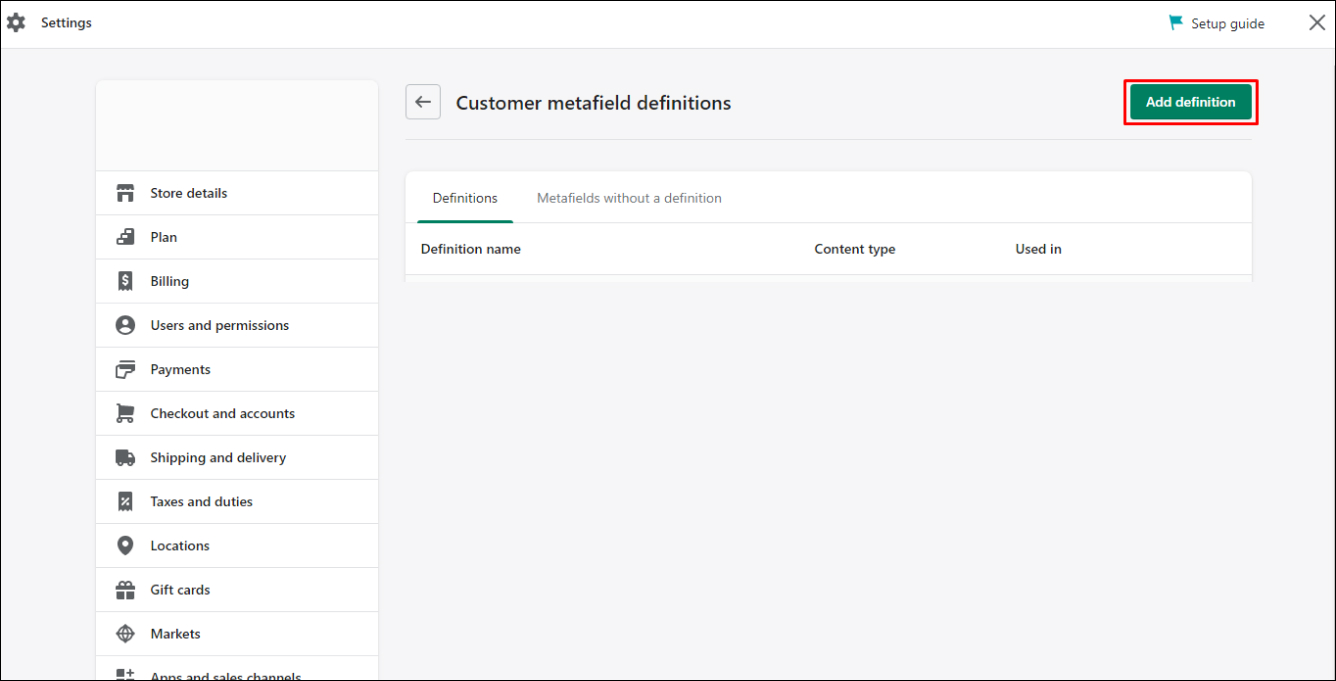
Step 3: Next, click on the Add definition button.
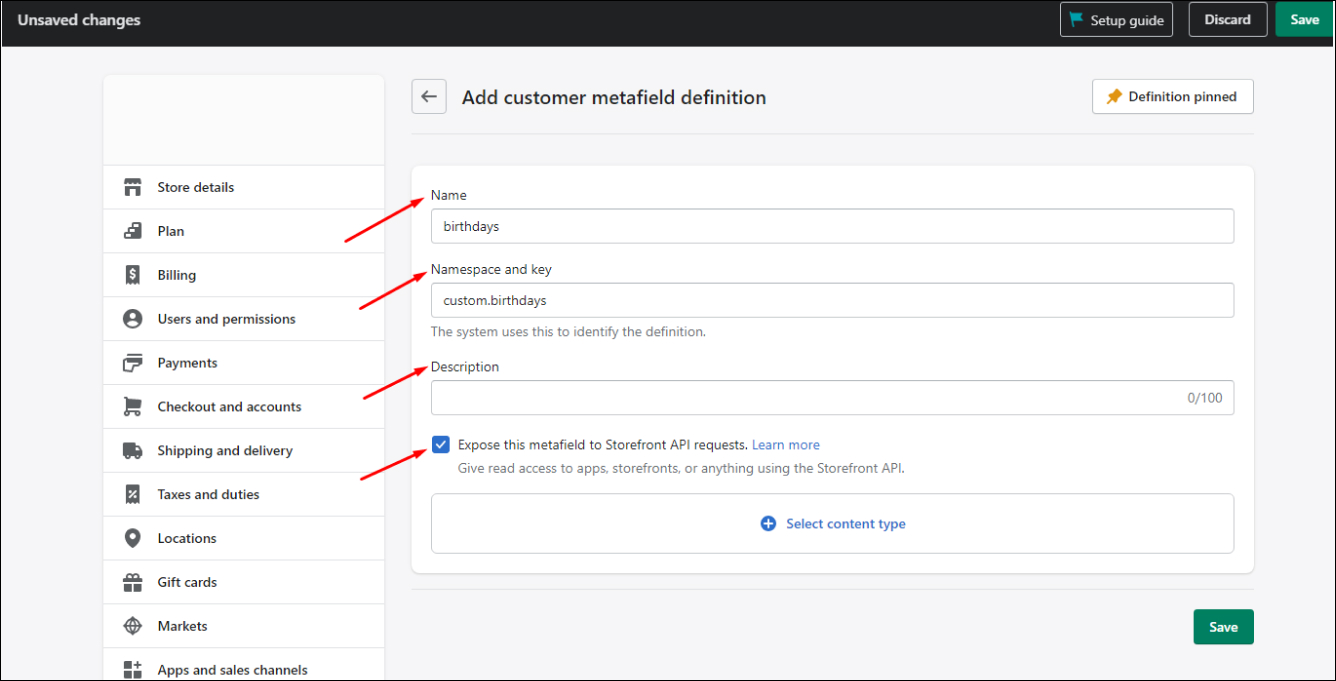
Step 4: Enter a name for the metafield definition. Here we’ll name it “Customer Birthdays”.
Step 5: Let the Namespace and key be as it is.
Step 6: You can add a description for your metafield definition, but it isn’t mandatory.
Step 7: Tick mark the Give access to Storefront API requests such that the metafield values are showcased on the storefront.
Step 8: From the Select content type, choose “Date”.
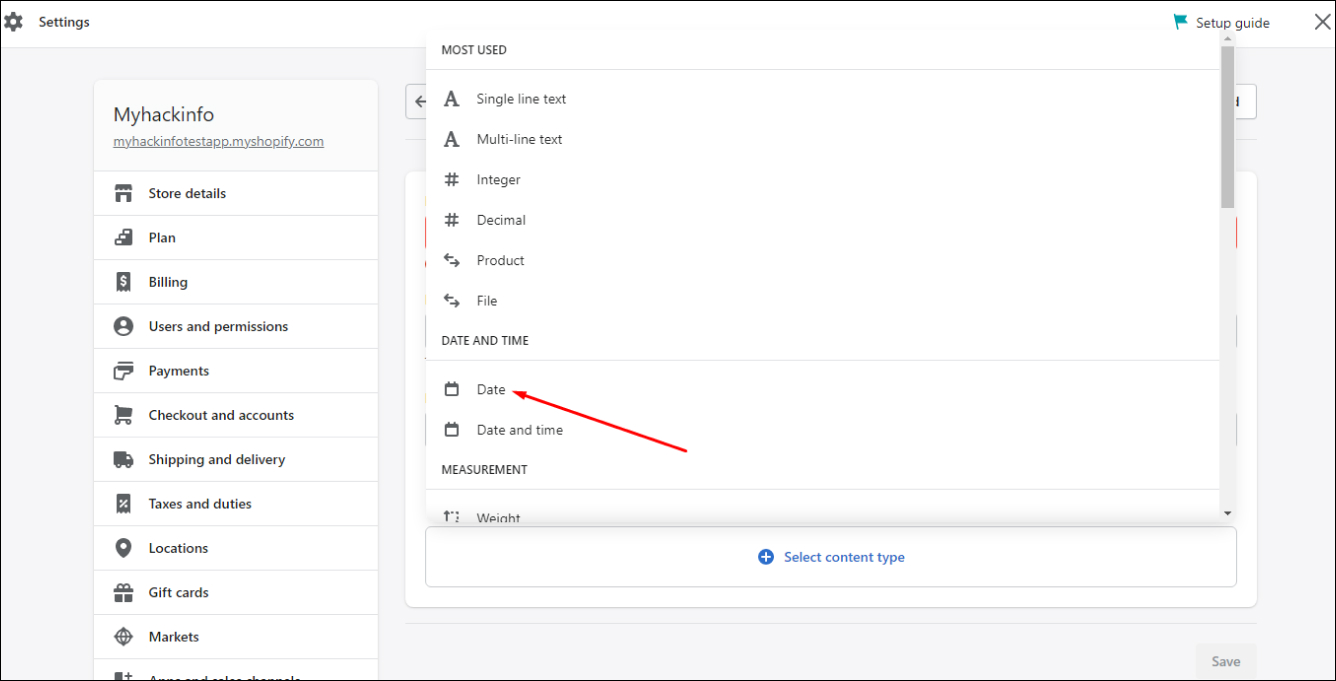
Step 9: Click on the “Save” button to save the metafield definition.
Adding Values to Collection Metafields in Shopify
After you’ve created the metafield definitions, now you need to add values to them.
Steps to Add Value to Customers Metafields
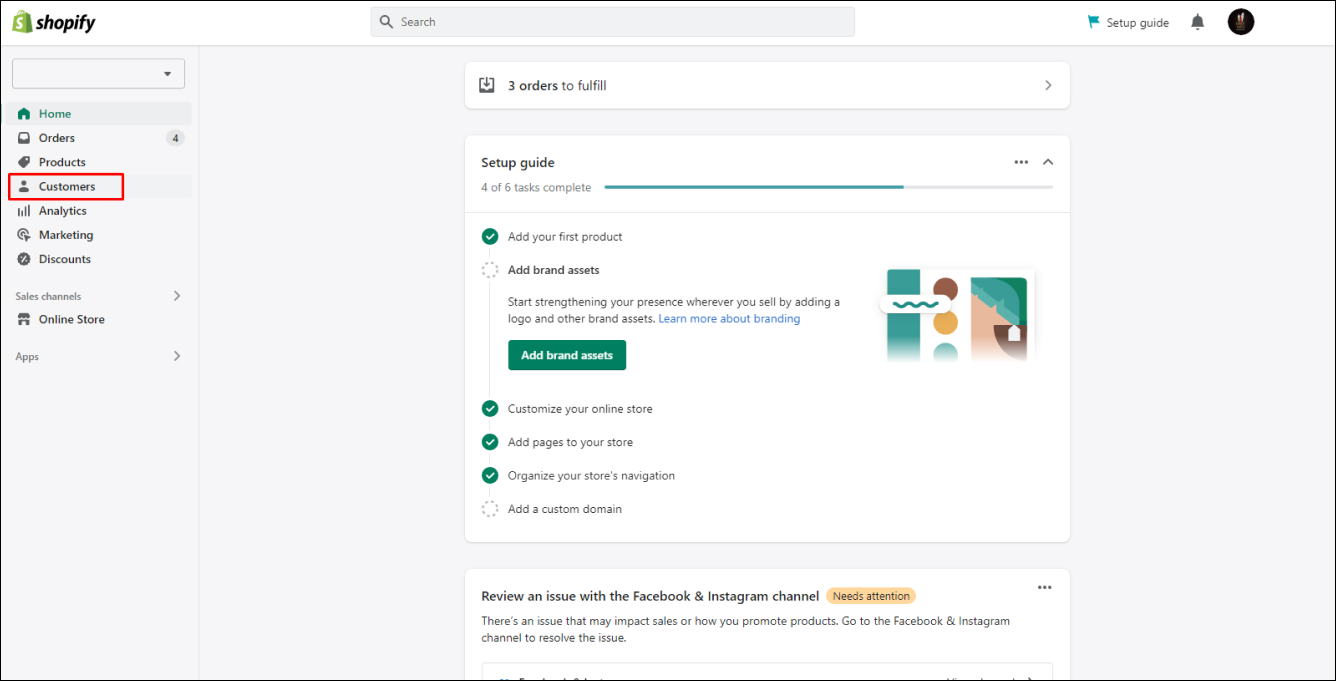
Step 1: Once you’re at the Shopify store admin area, go to Customers.
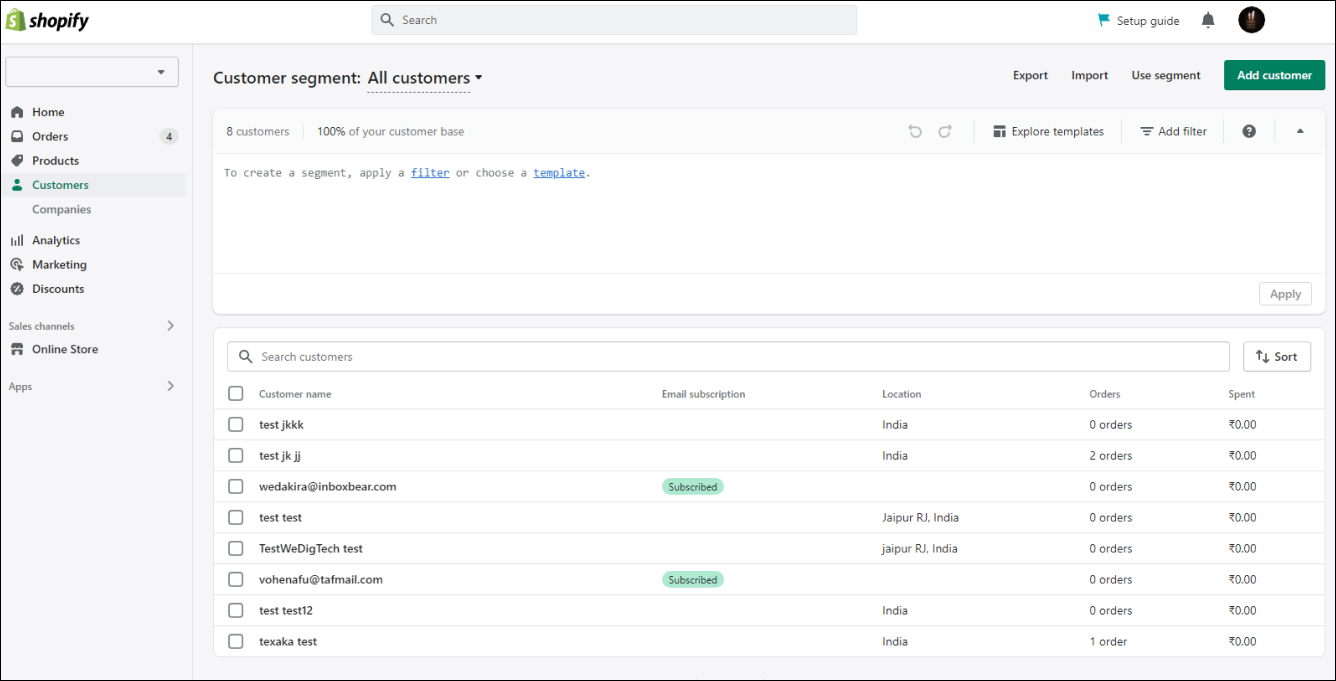
Step 2: Click on any of the Customers.
Step 3: Scroll down to the page to find Metafield section.
Step 4: Enter the value in the metafield as shown below.
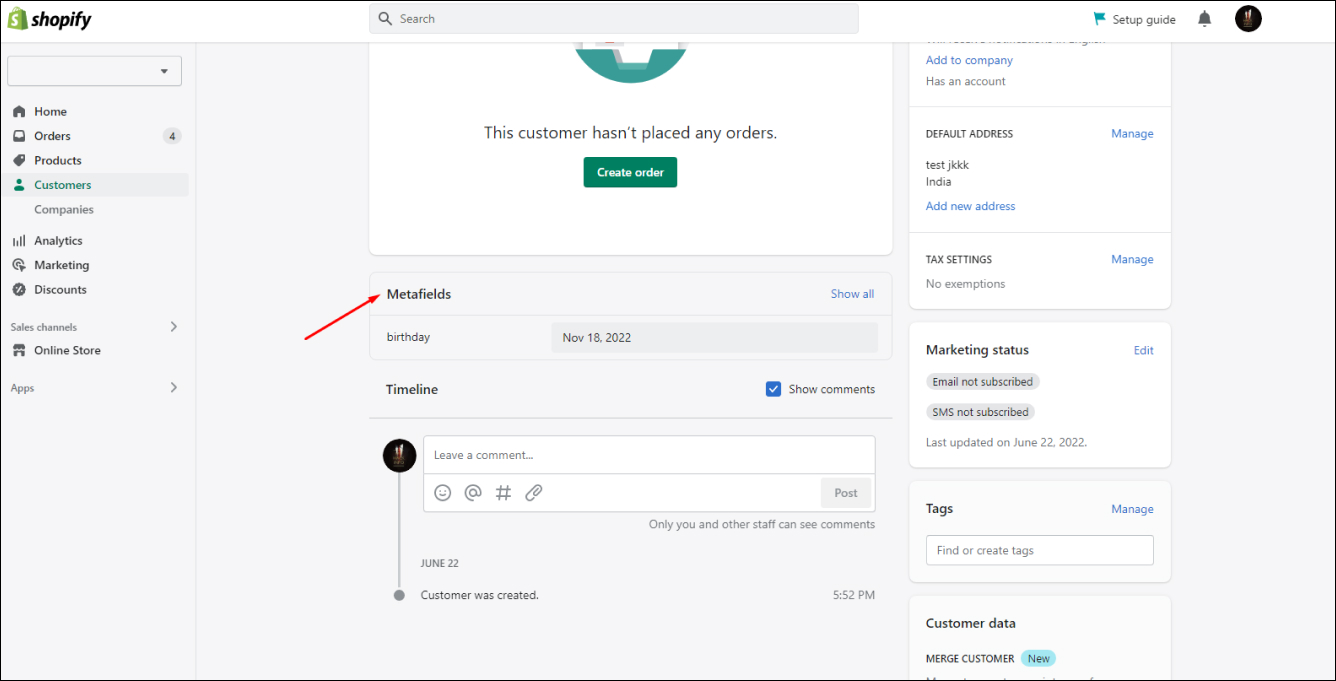
Step 5: Lastly, save the changes.
How to Display Customer Metafields on the Shopify Store?
Once you’ve added values to the variant metafields, it is now time you display them.
Steps to Display Customer Metafield Values in Shopify
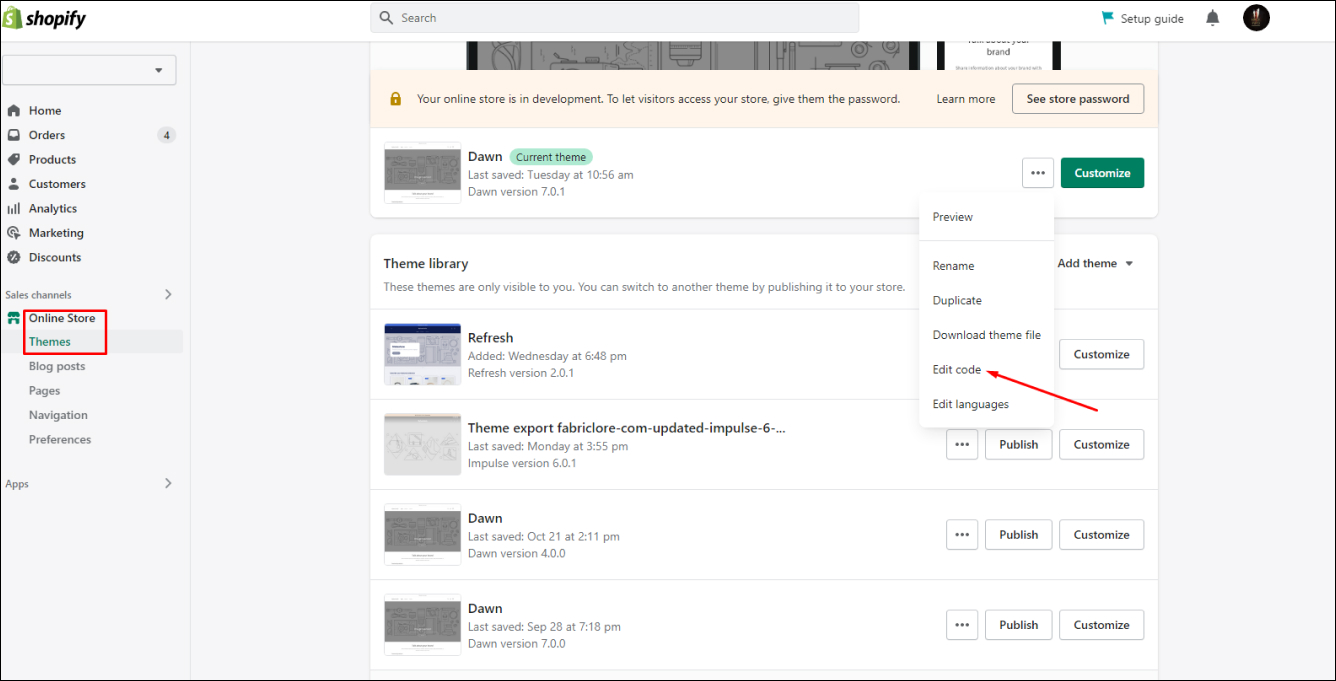
Step 1: Click on Online Store > Themes > Edit Code. This will direct you to the theme editor of Shopify.
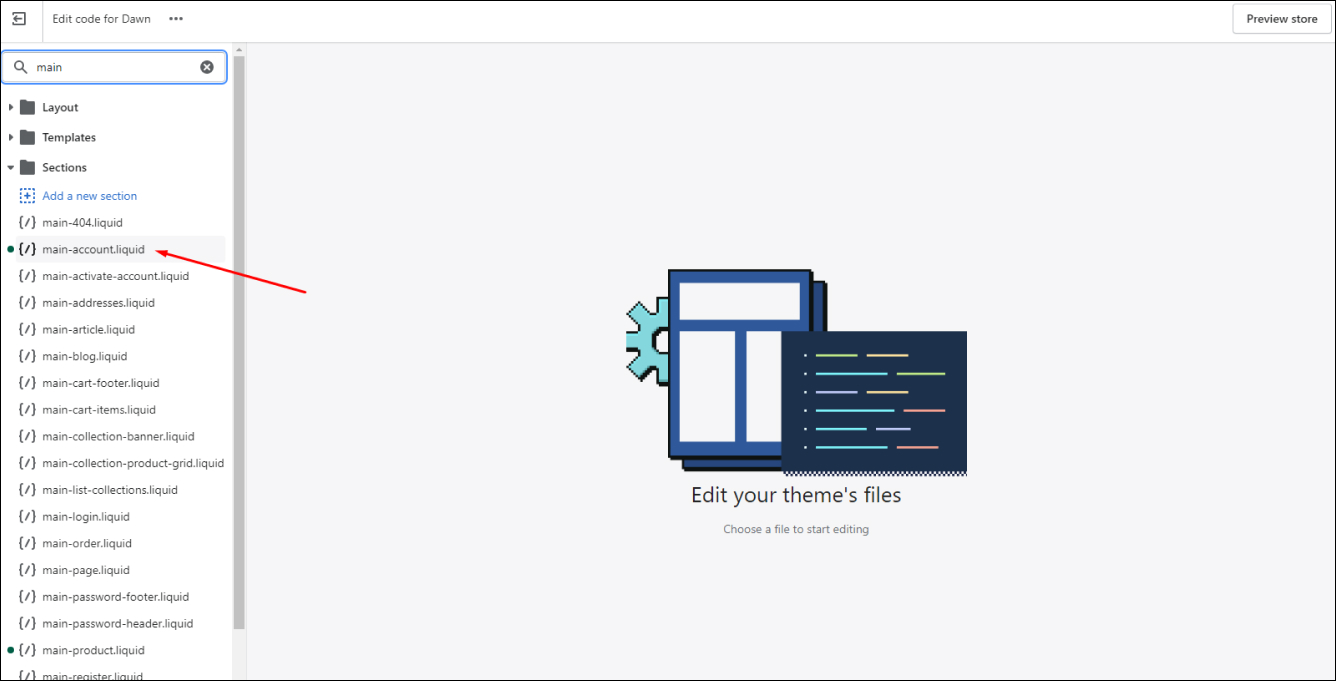
Step 2: Next, you need to search for main-account.liquid in the left sidebar.
Step 3: Depending on the design, you need to edit the code into the main-account.liquid file.

Step 4: Lastly, click on the “Save” button.
Conclusion
Customer metafields play a vital role in customizing and personalizing your online store. If you use it generously on your storefront, you can create a unique and personalized experience for your customers.
If faced any issues while following the steps, let us know in the comments section. We’ll reach out to you with a solution.
If you want more helpful guides regarding Shopify, go through our blog section.